Springboot-实现微服务Bot代码的执行

Springboot-实现微服务Bot代码的执行
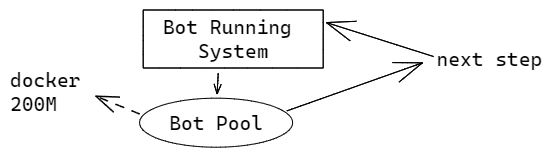
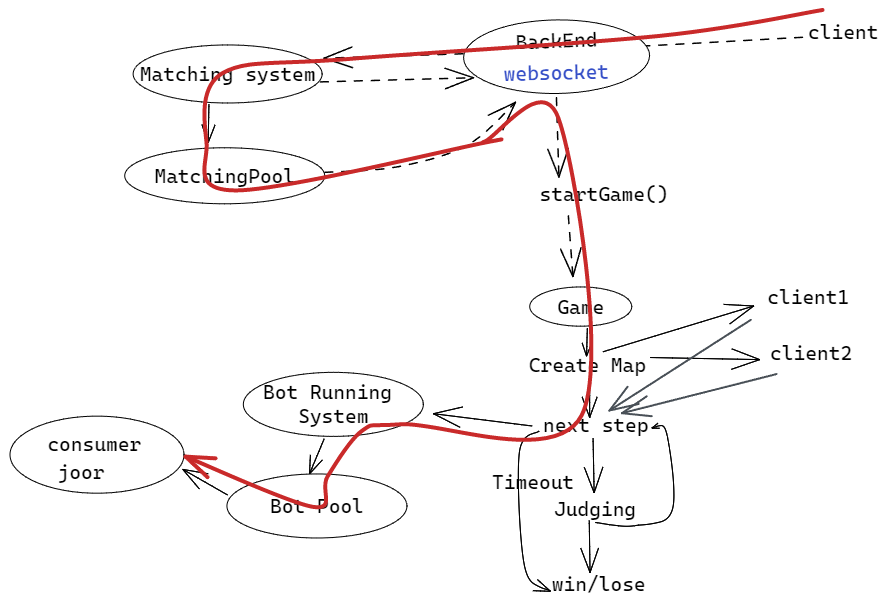
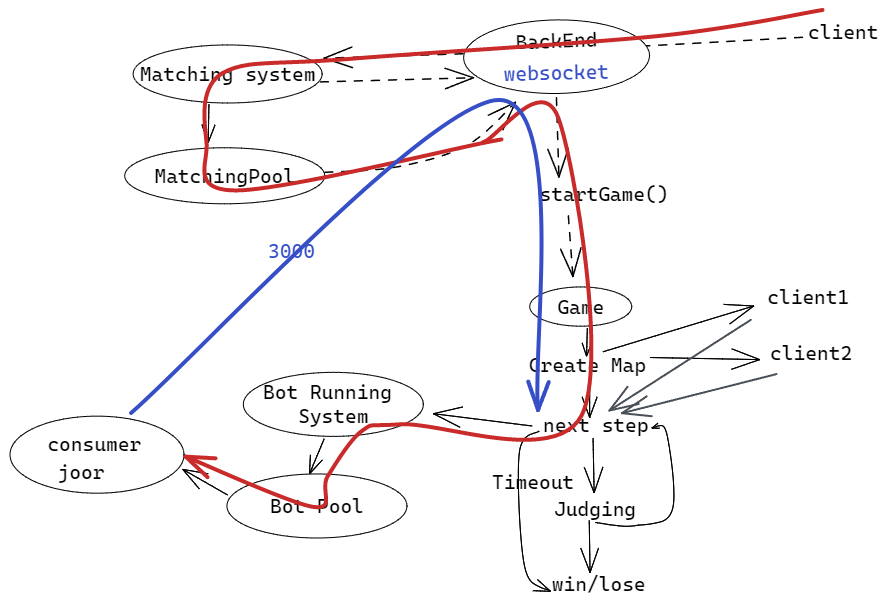
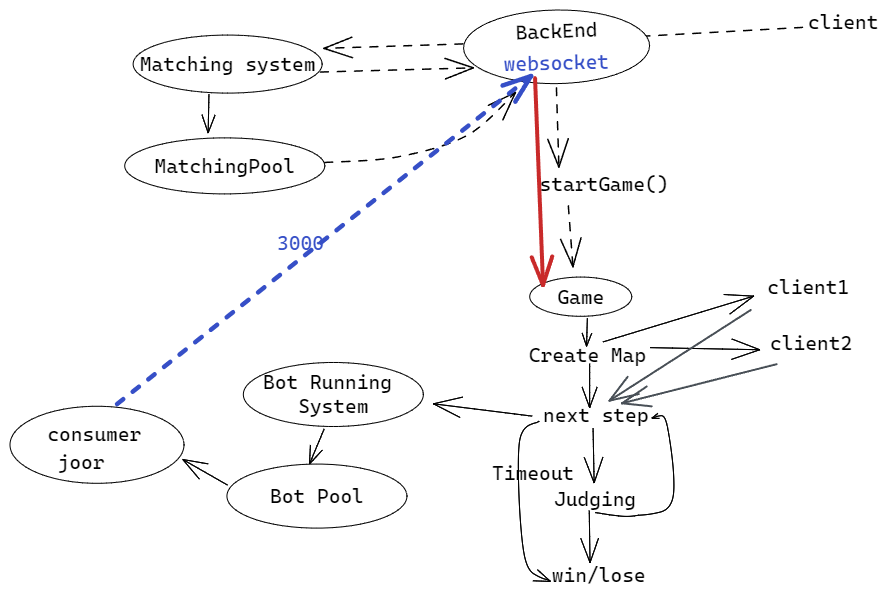
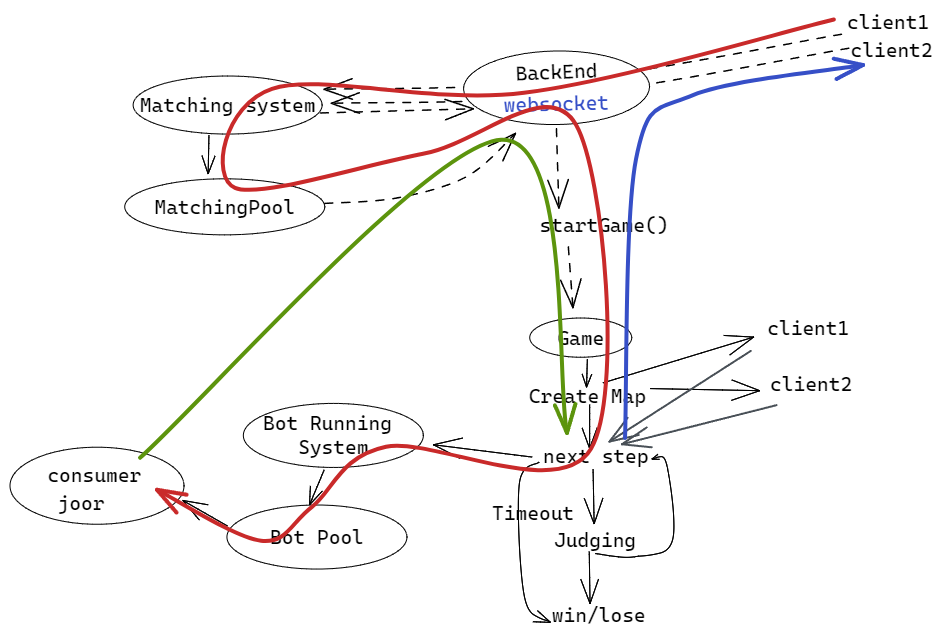
xujiaojiao流程设计
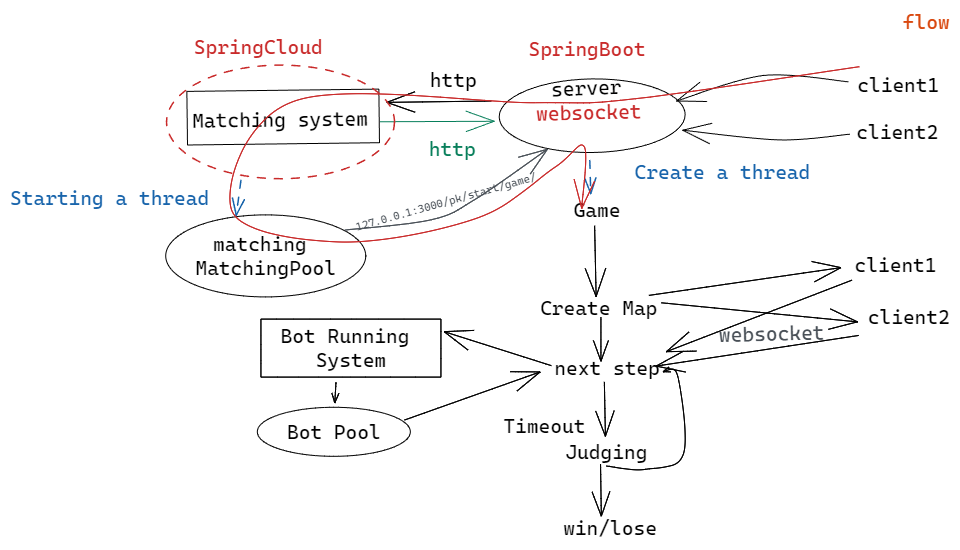
接下来要实现的是,Bot 代码执行的微服务部分。
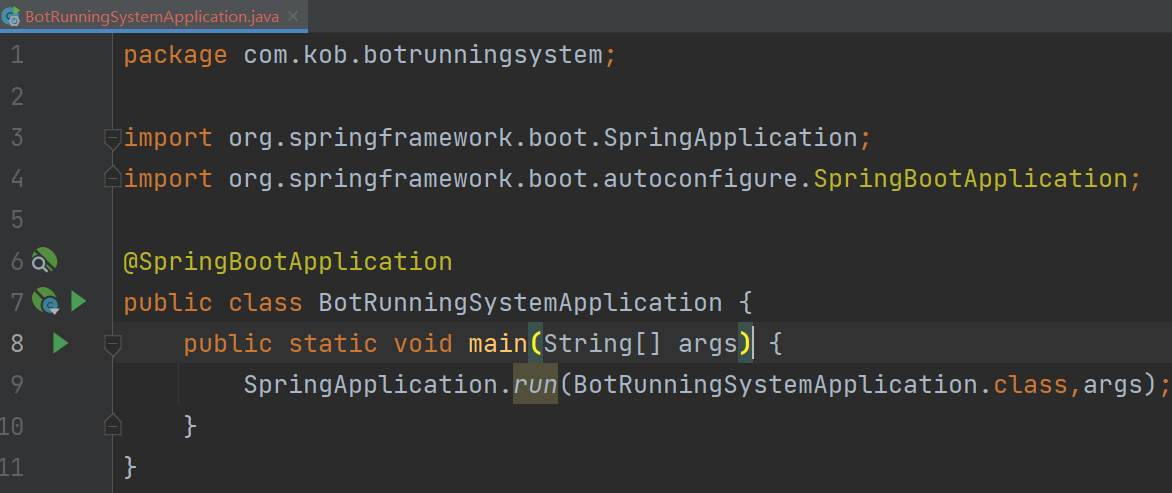
初始化
相应的,首先要创建该服务的后端。
然后将matchingsystem模块的依赖直接复制过来
1 | <dependencies> |
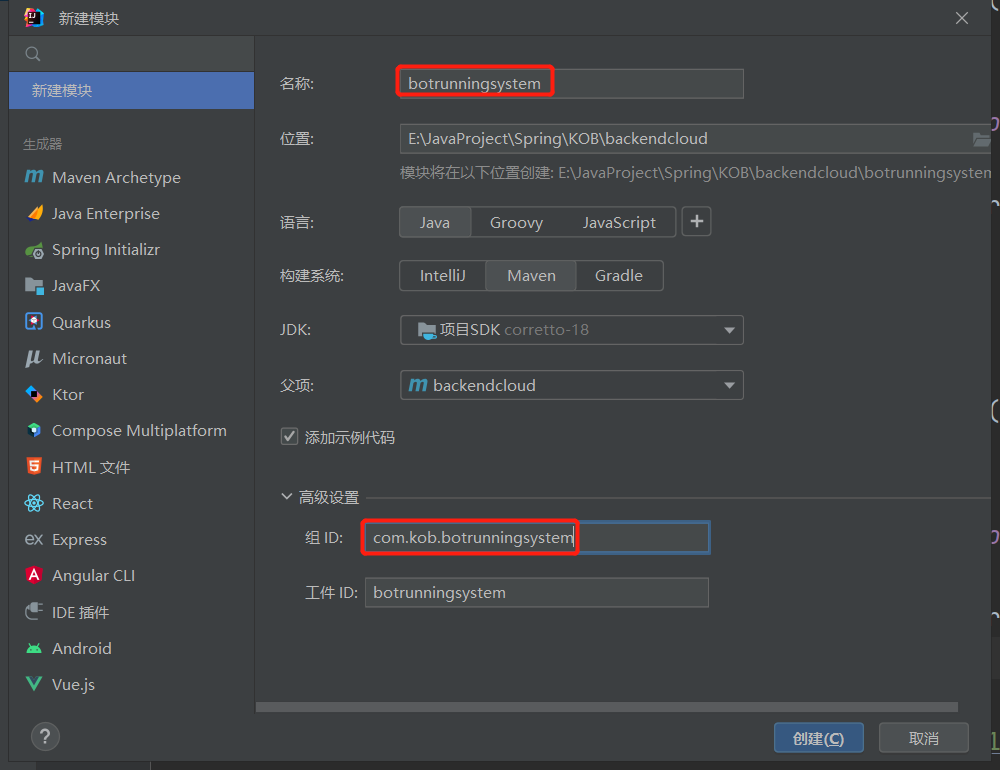
同时在BotRunningSystem项目中添加依赖joor-java-8(Maven 仓库地址):用于动态的编译和执行代码
为了如果拓展为实现其他语言,可以在云端自动启动一个docker容器,来执行其他语言。
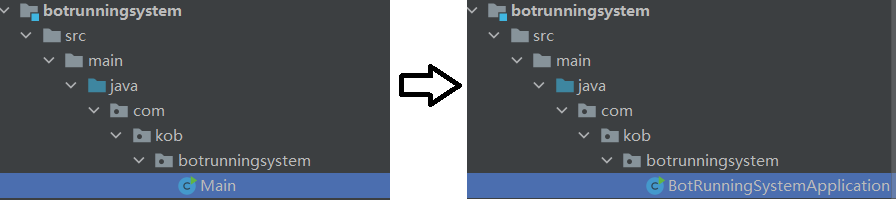
重命名:
同时添加resources/application.properties文件,写入端口号
1 | server.port=3002 |
后端 API
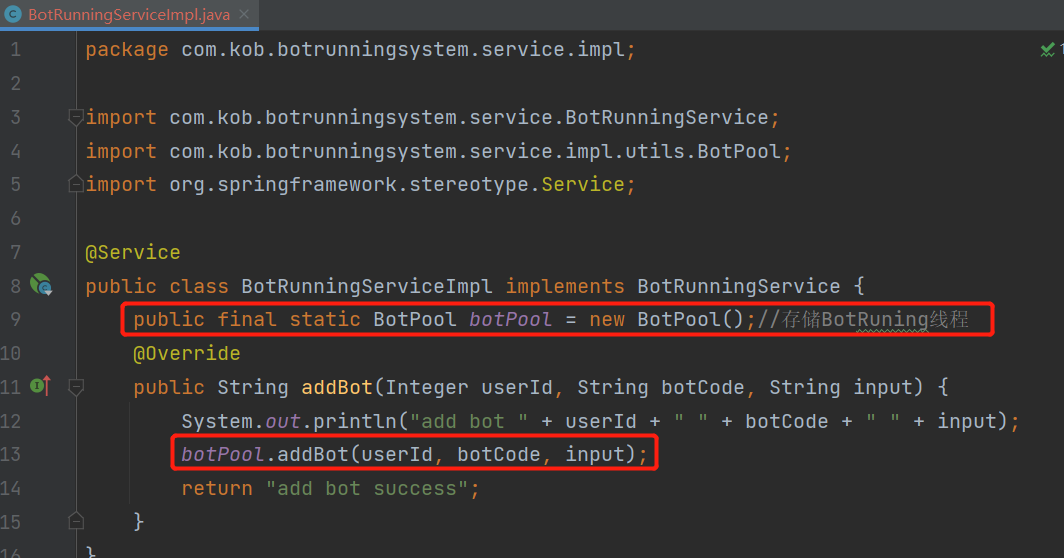
首先要实现一个后端 API,接收 Bot 代码,并将其加入到 Bot 运行池
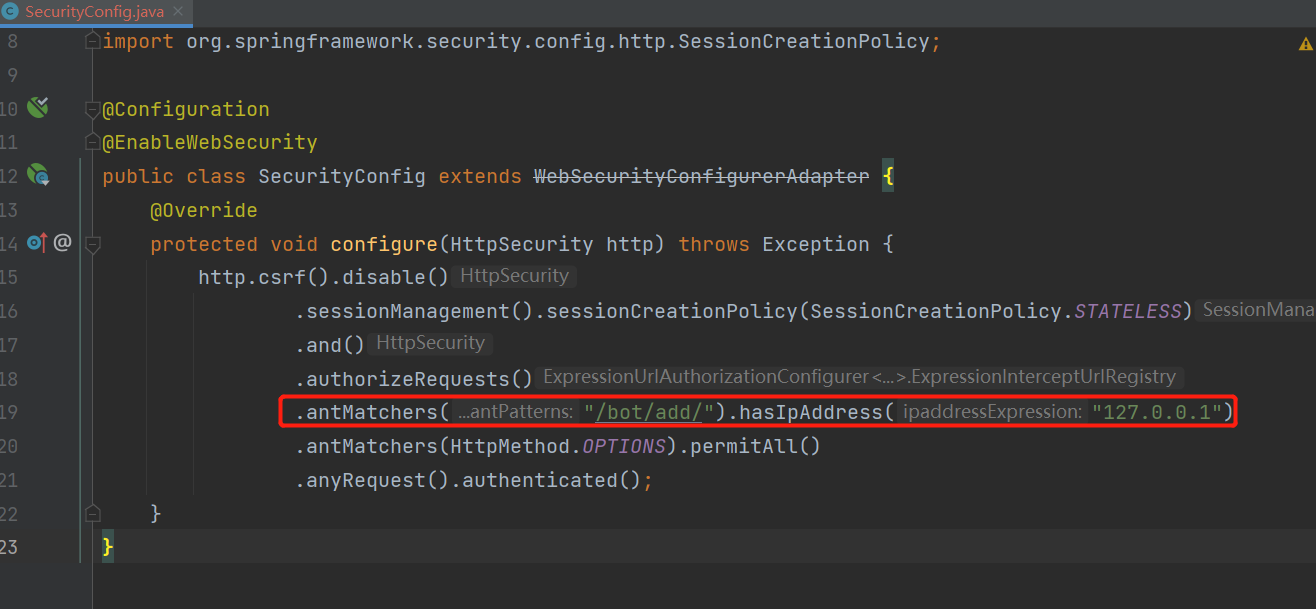
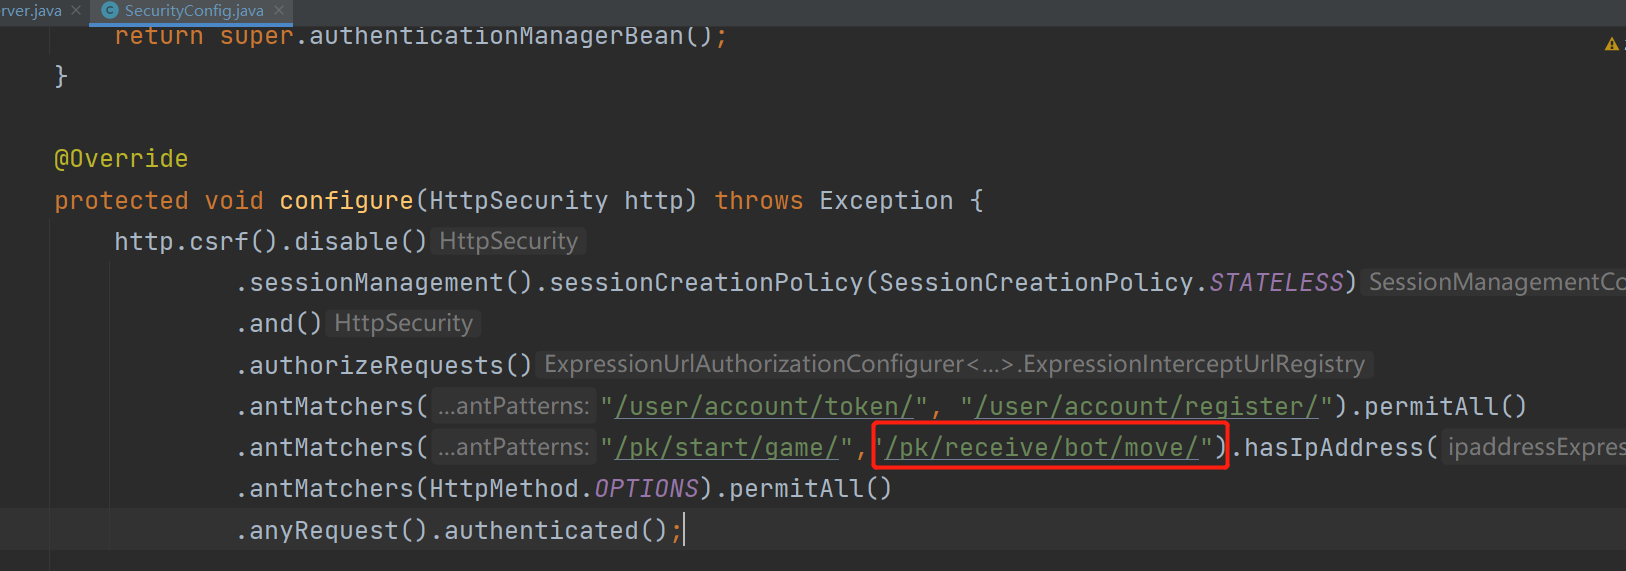
实现后端 API 需要加入对应的controller, service, service.impl,以及添加ResTemplateConfig,并且在SecurityConfig中配置网关。
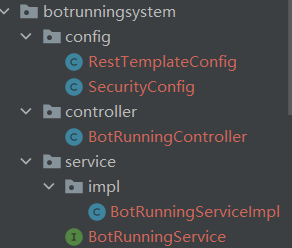
下面暂时写一些测试性的内容。
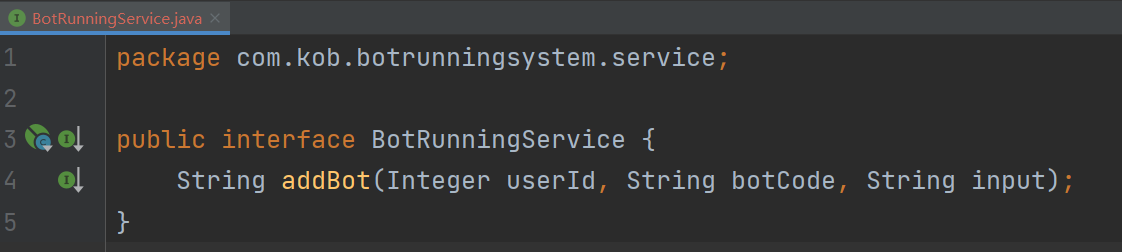
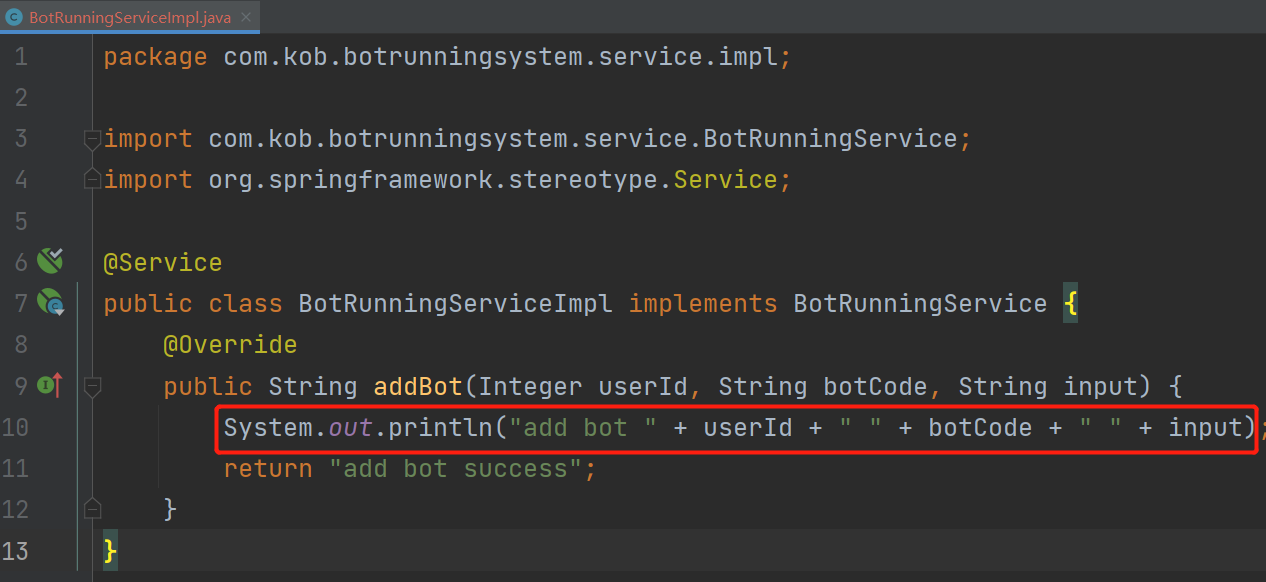
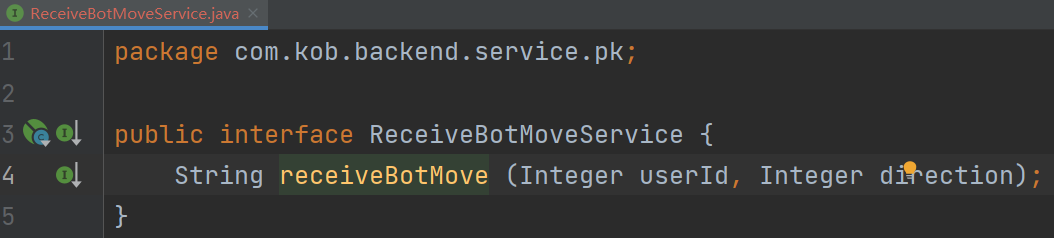
BotRunningService.java
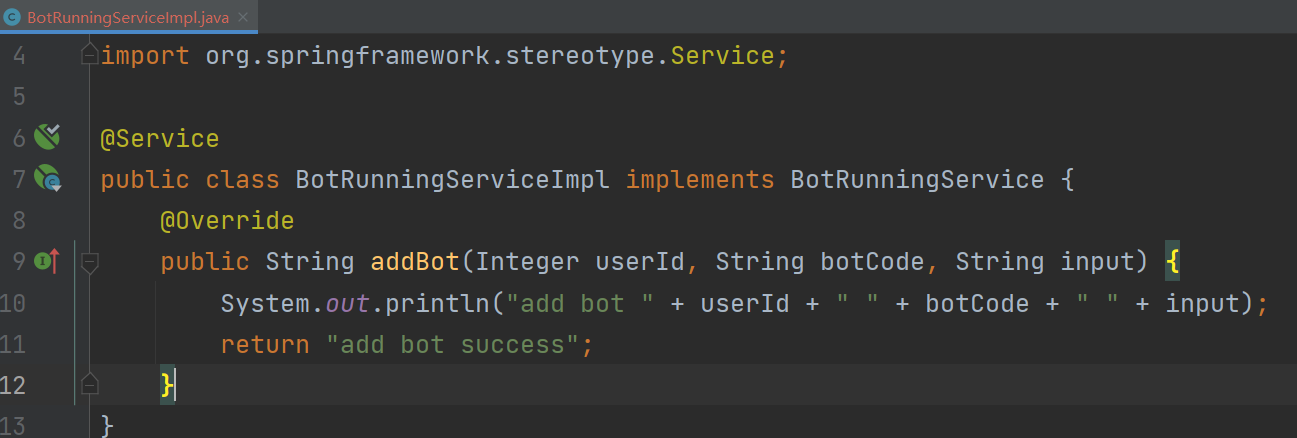
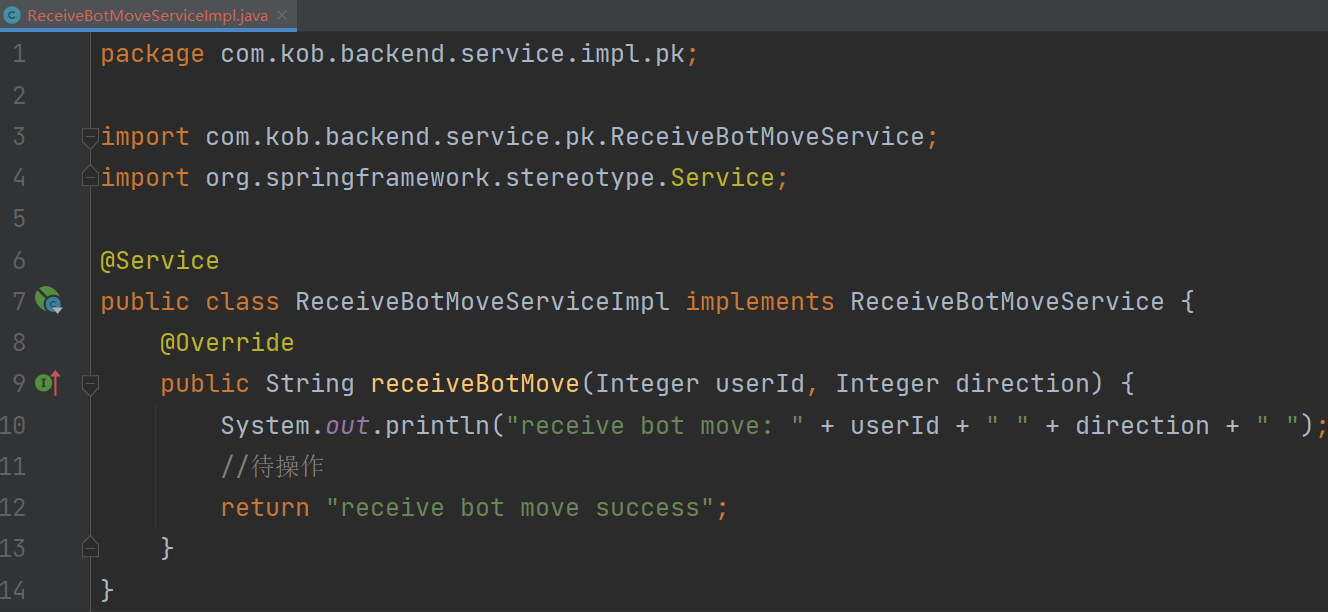
BotRunningServiceImpl.java
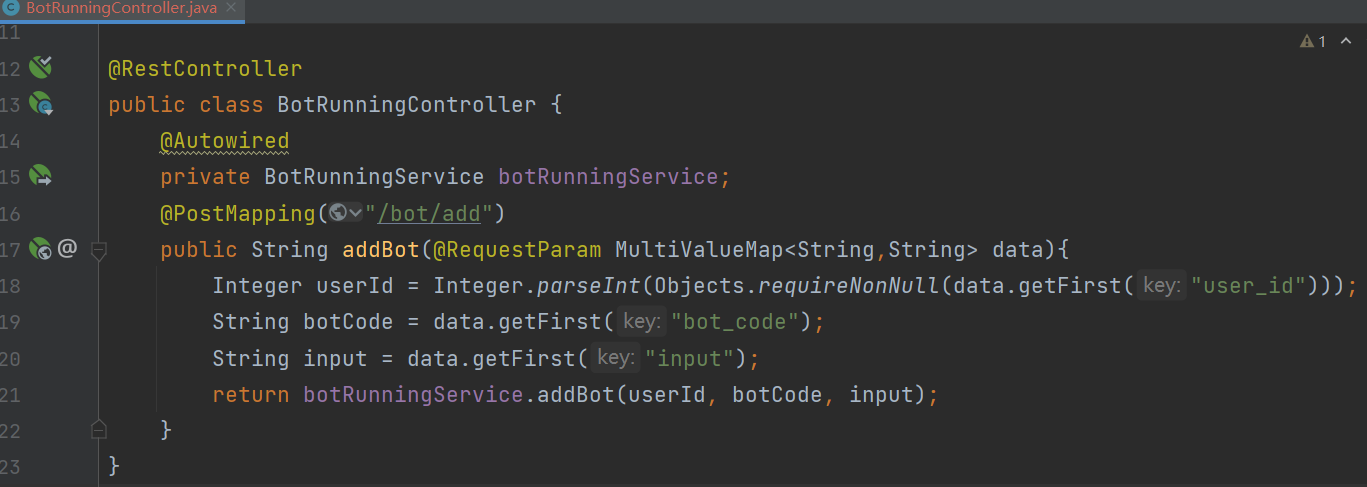
BotRunningController.java
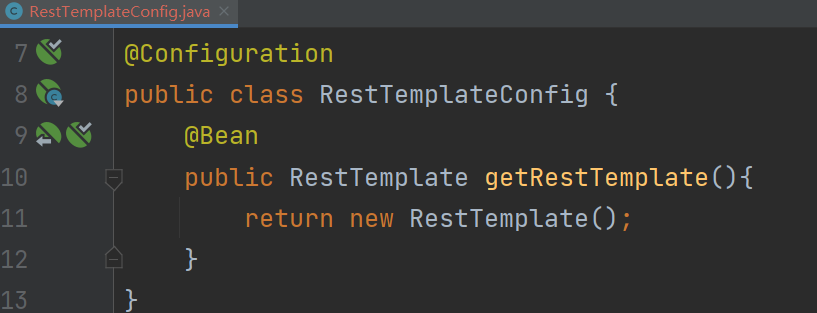
RestTemplateConfig.java
SecurityConfig.java,用于配置网关
修改前端
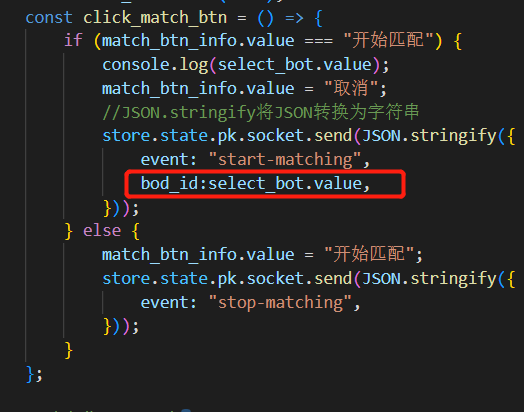
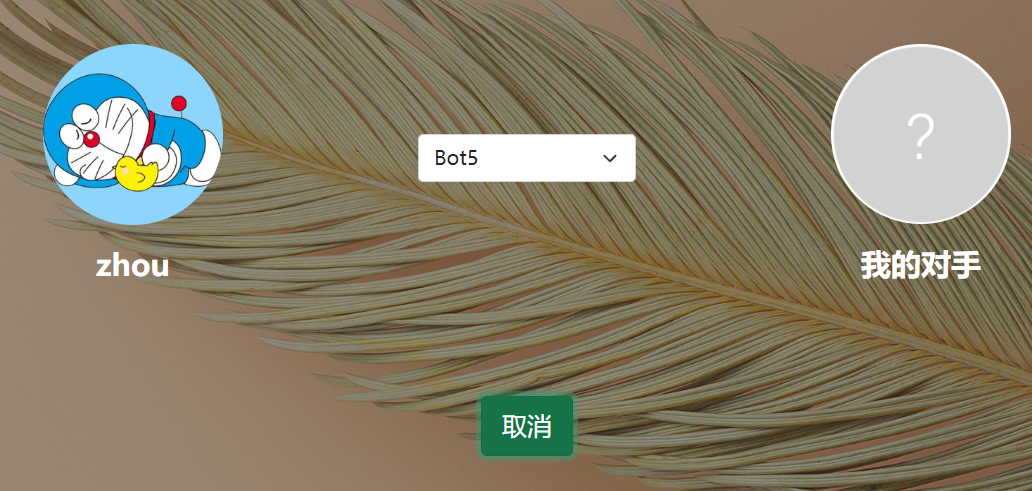
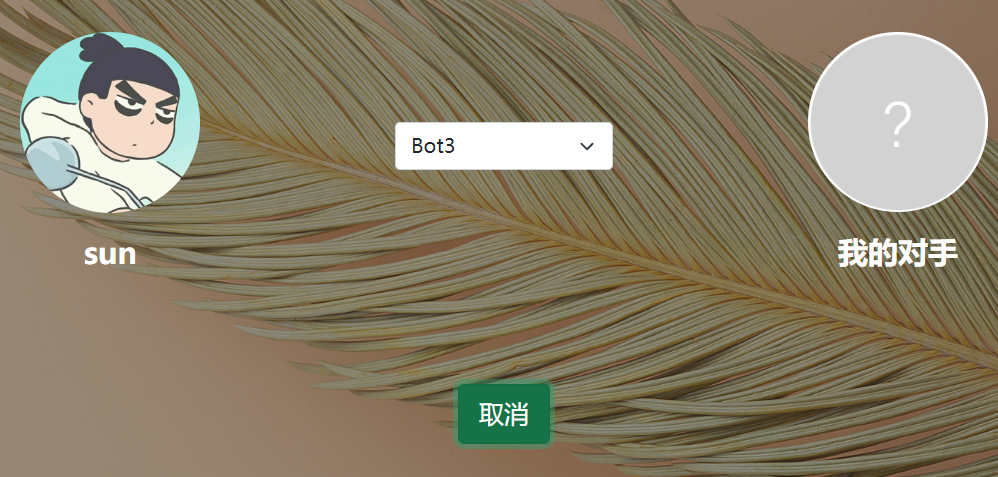
前端需要做一些修改,可以选择人工对战还是 Bot 参与对战。
并且,在 client 向 server 发请求时,如果是 Bot 参与对战,还需要指名 bot_id
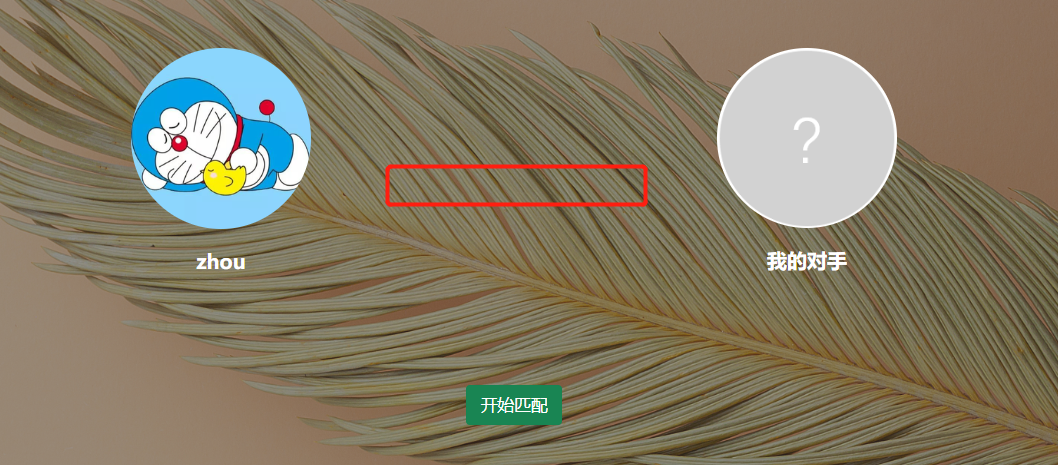
需要在匹配页面加入一个复选框
在 BootStrap 中找到相应工具
添加如下:
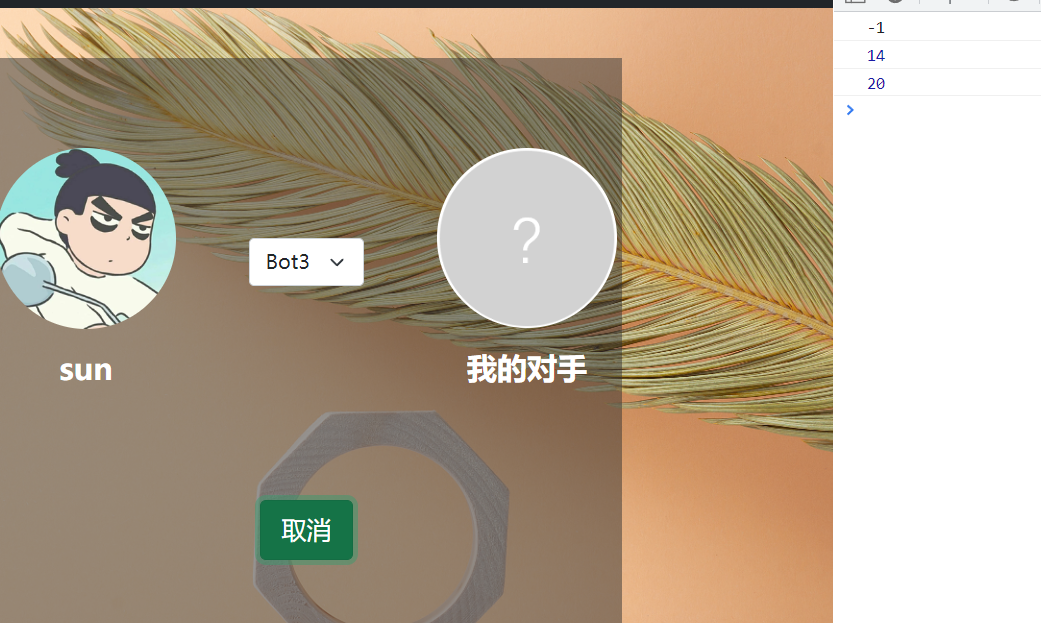
效果:
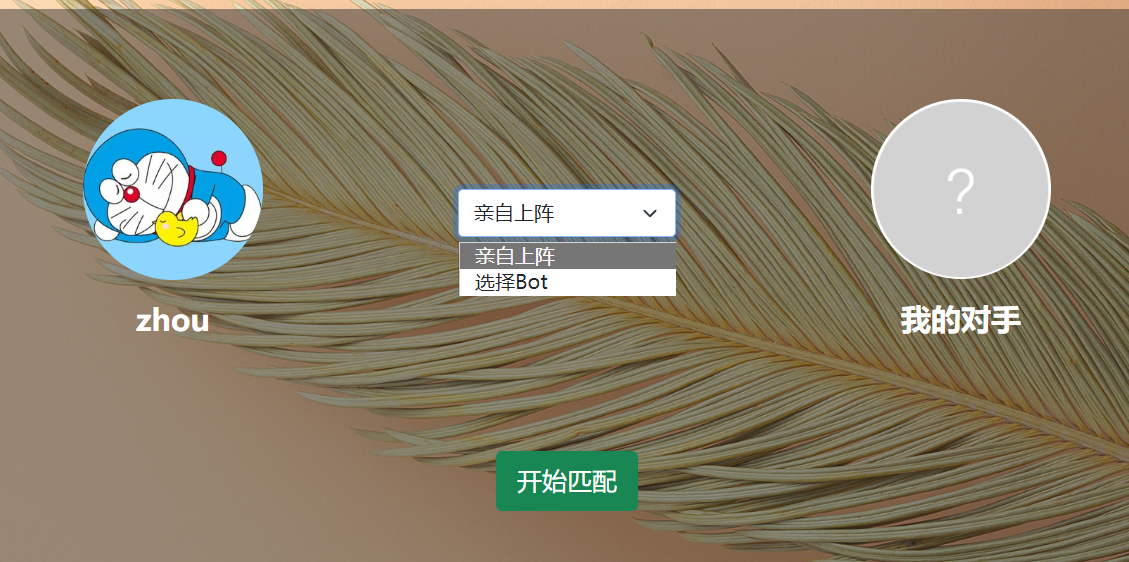
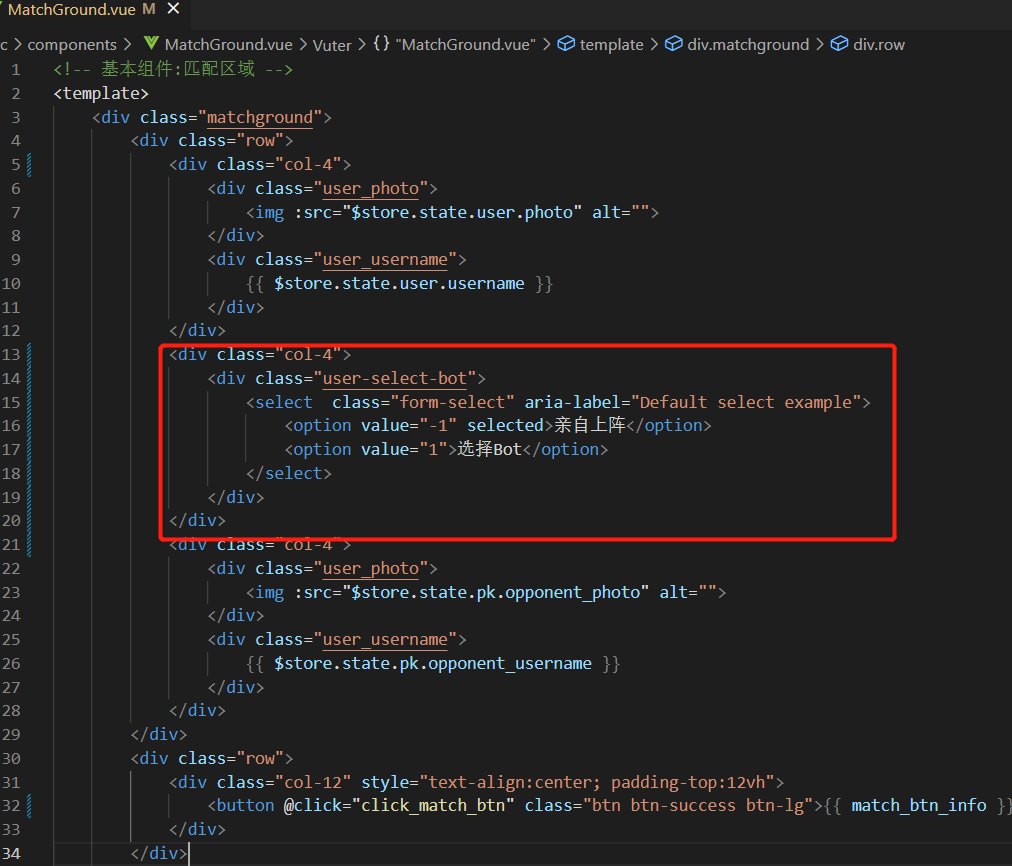
然后还需要动态的获取 Bot 列表,
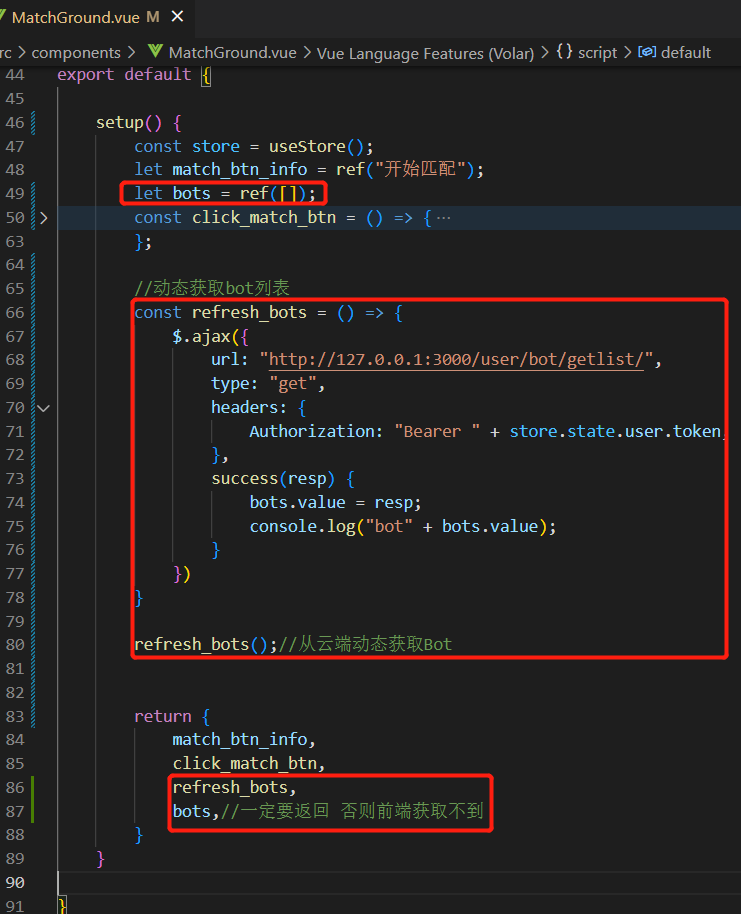
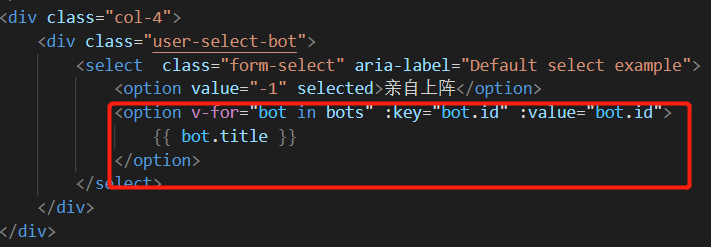
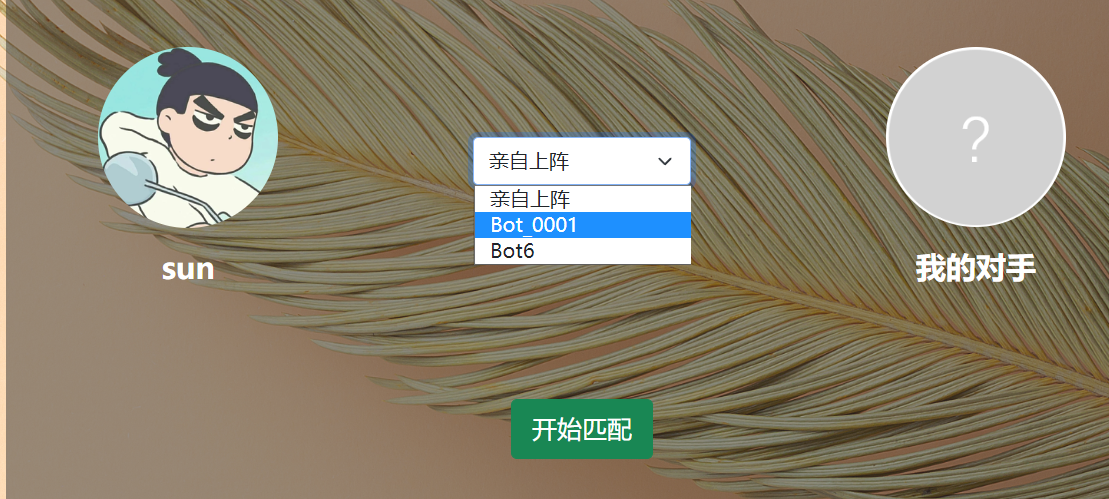
同样,需要将用户选择了哪个 bot 告诉前端,引出需要做一个双向数据绑定。
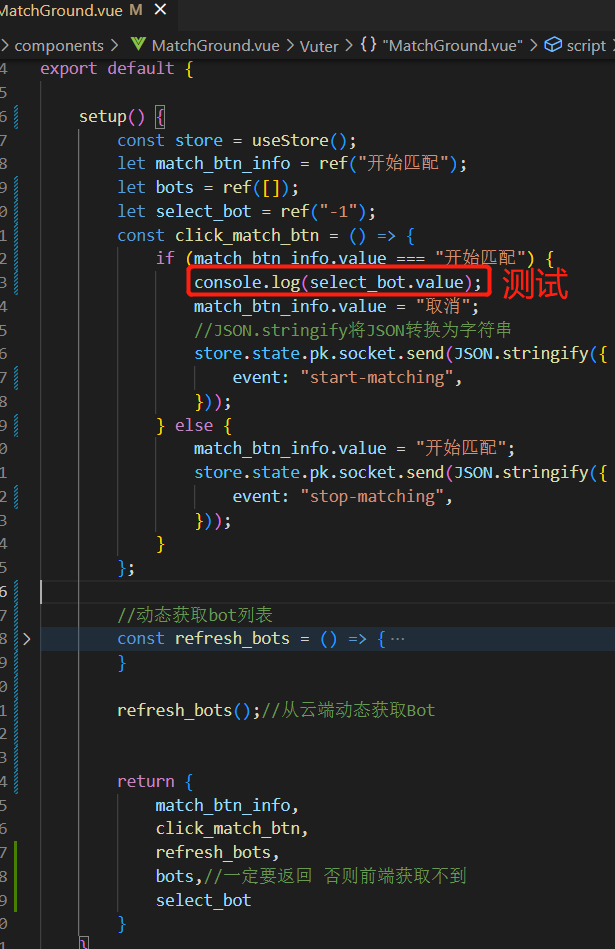
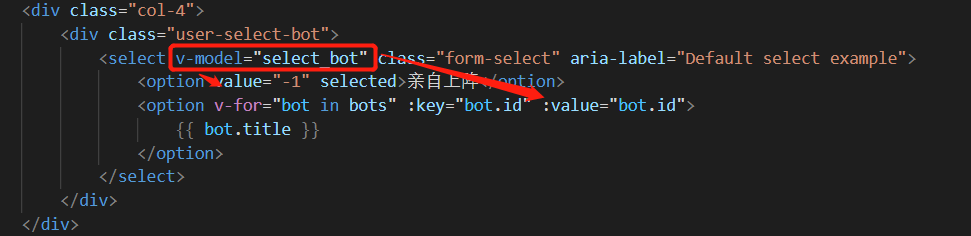
这样将用户的选择与前端的变量就双向绑定了起来。
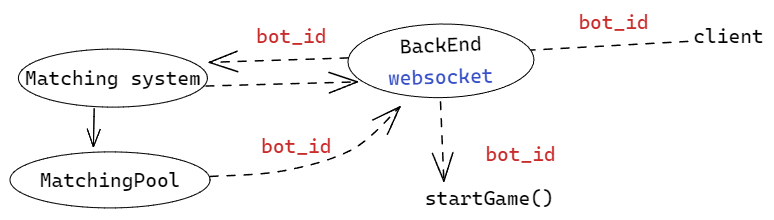
参数传递
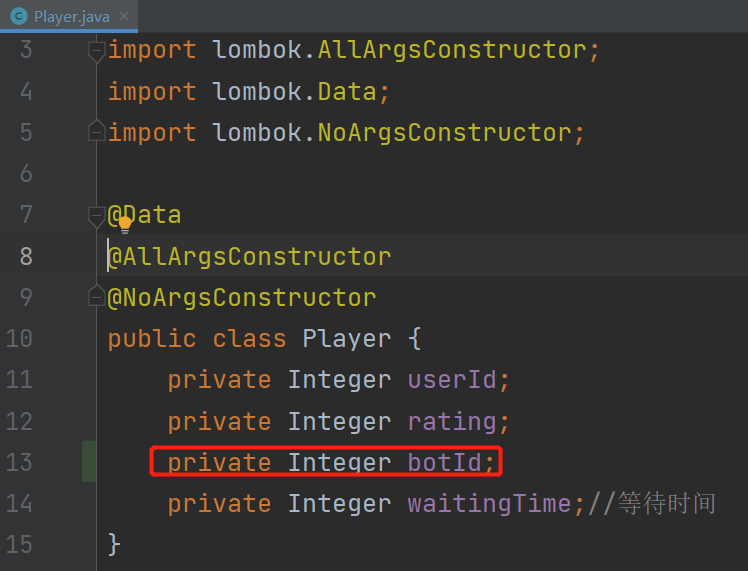
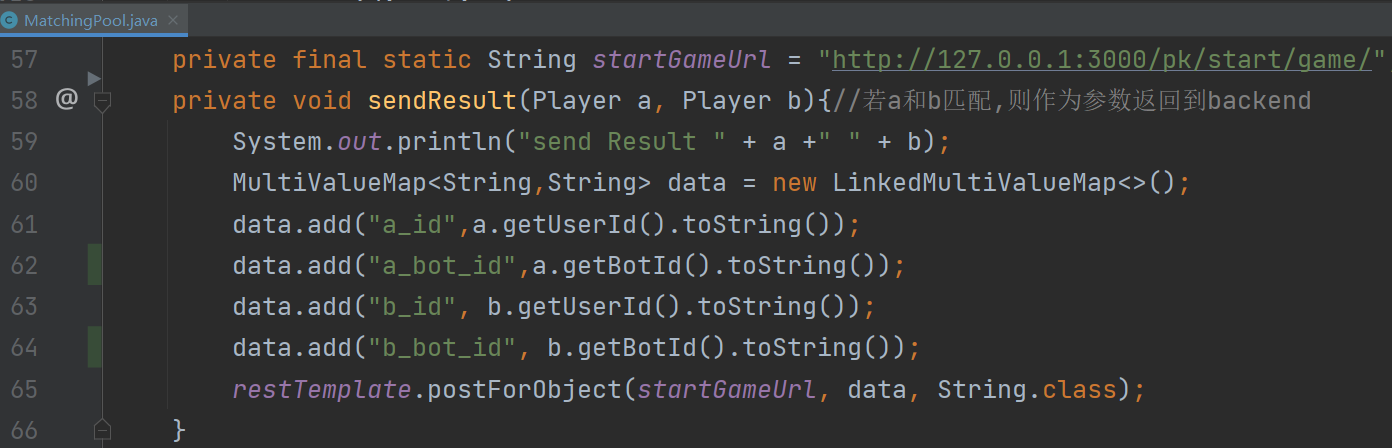
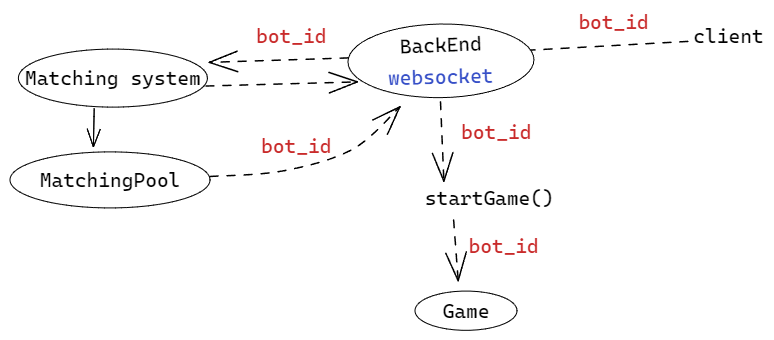
然后需要在通信的时候,将 user_id 作为参数返回,并且后端也要相应的接收参数。
BackEnd 端接收
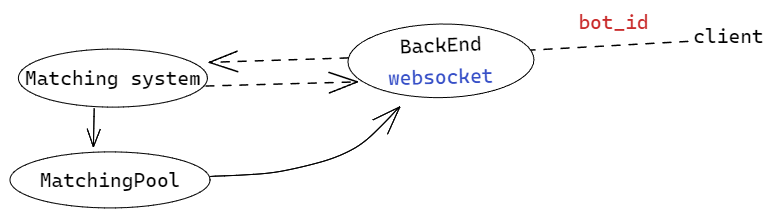
BackEnd 端向 MatchingSystem 端发送
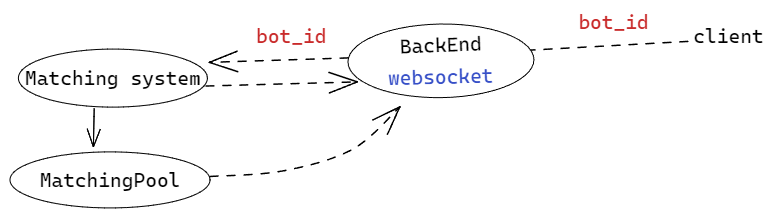
MatchingSystem 端接收
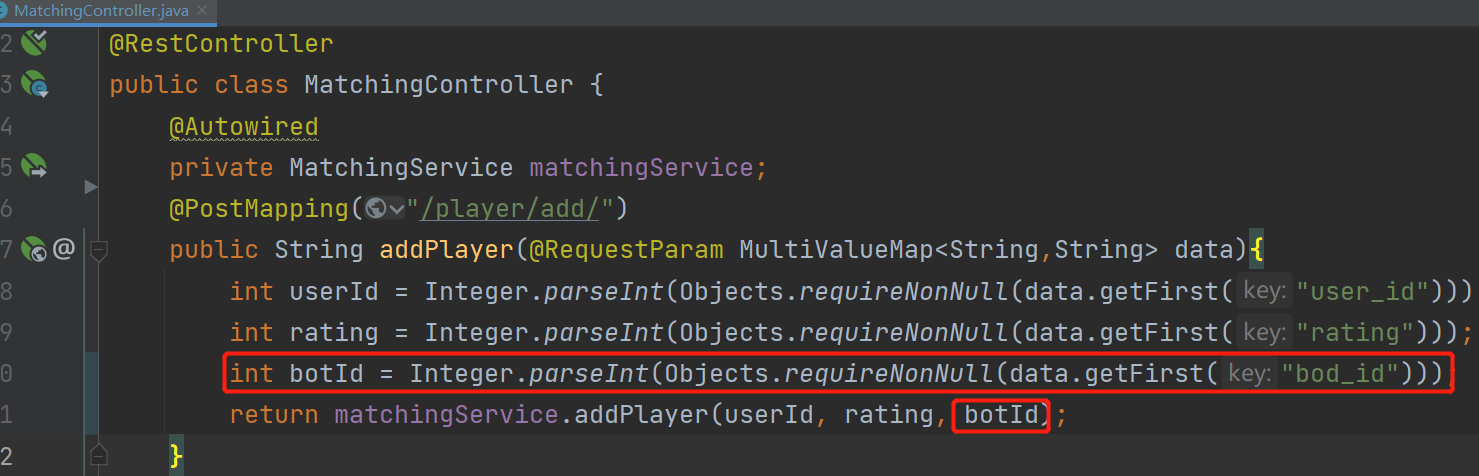
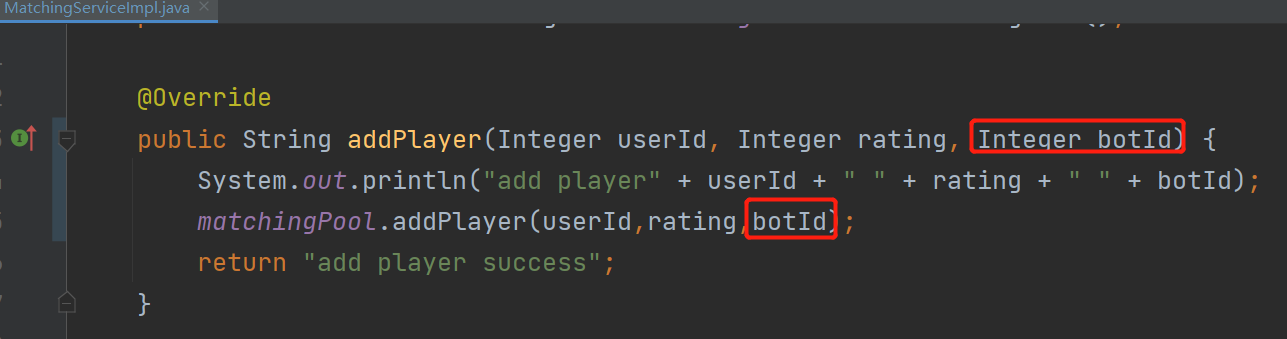

同样 MatchingSystem 端再向 Backend 端返回结果的时候,也需要发送一个 botId
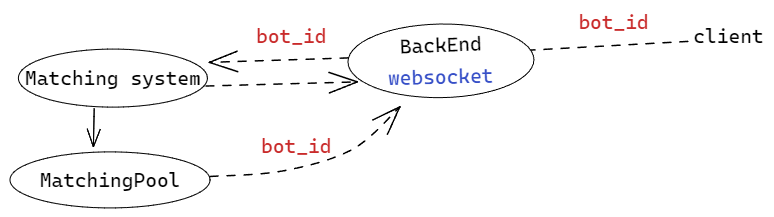
Backend 接收参数
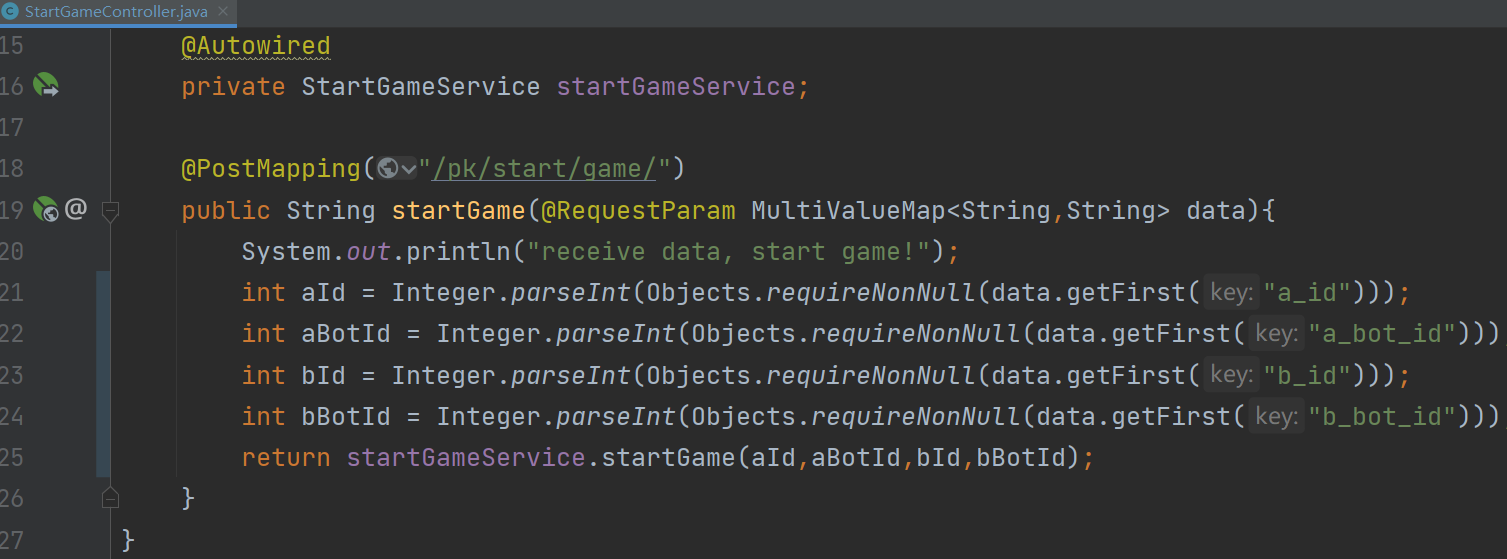

这次,整个发送 bot_id 的流程才算完整。
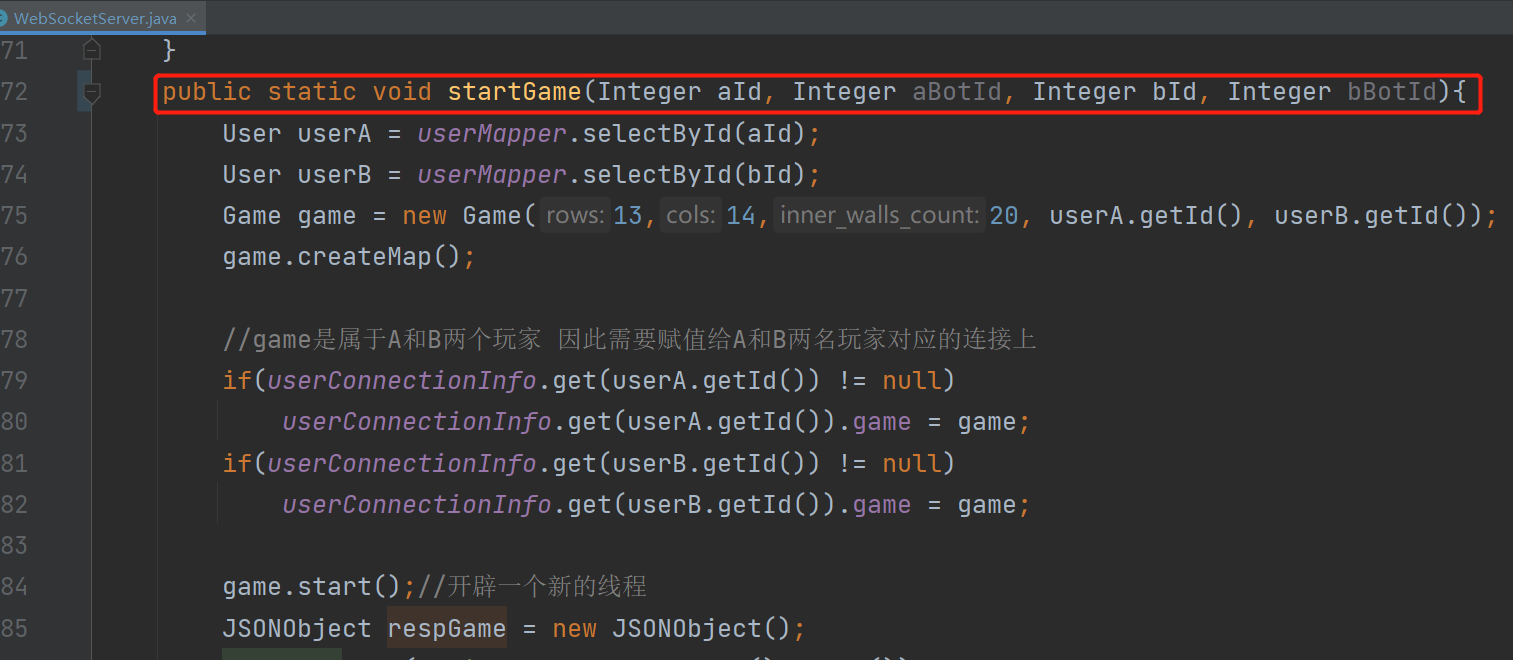
取到 Bot 信息
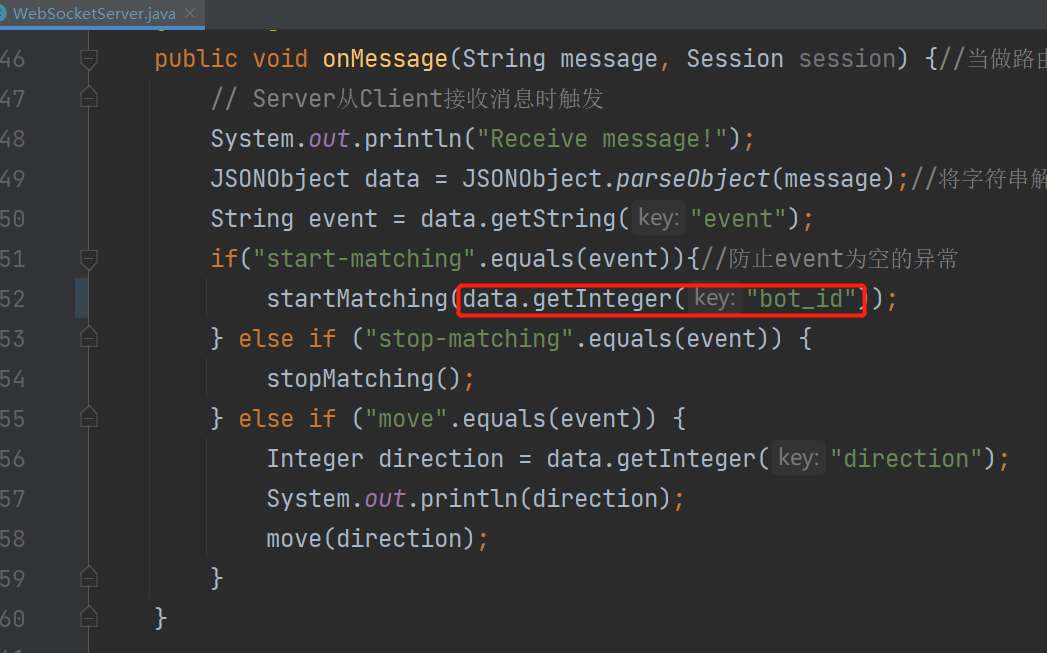
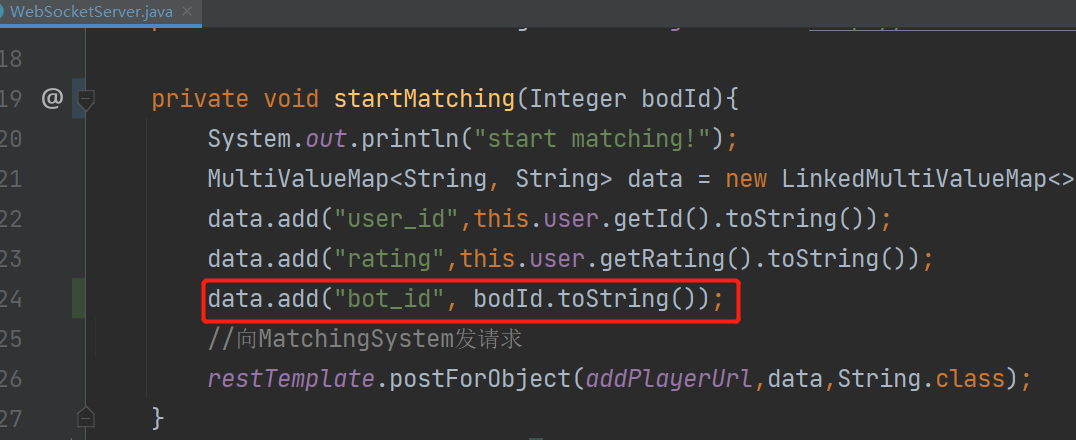
WebSocketServer.java
1)首先将 BotMapper 注入
1 | private static BotMapper botMapper; |
2)借助 BotMapper 将两个用户选择的 bot 取出
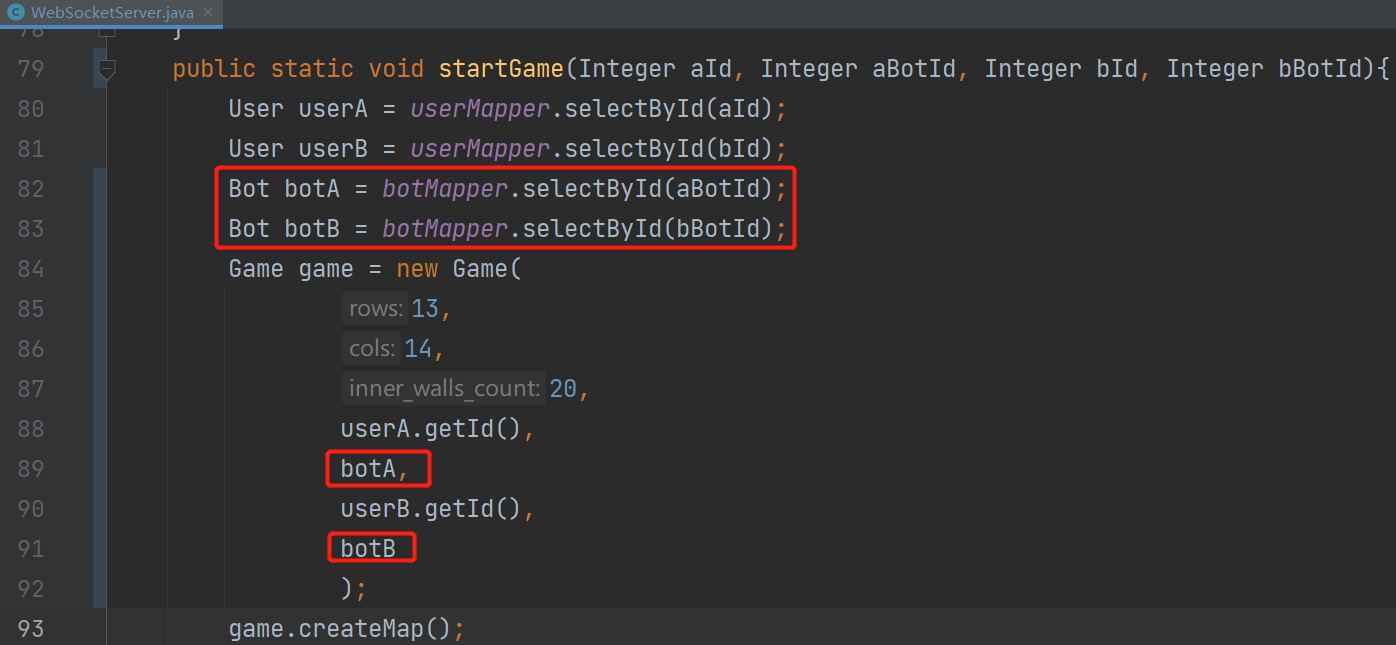
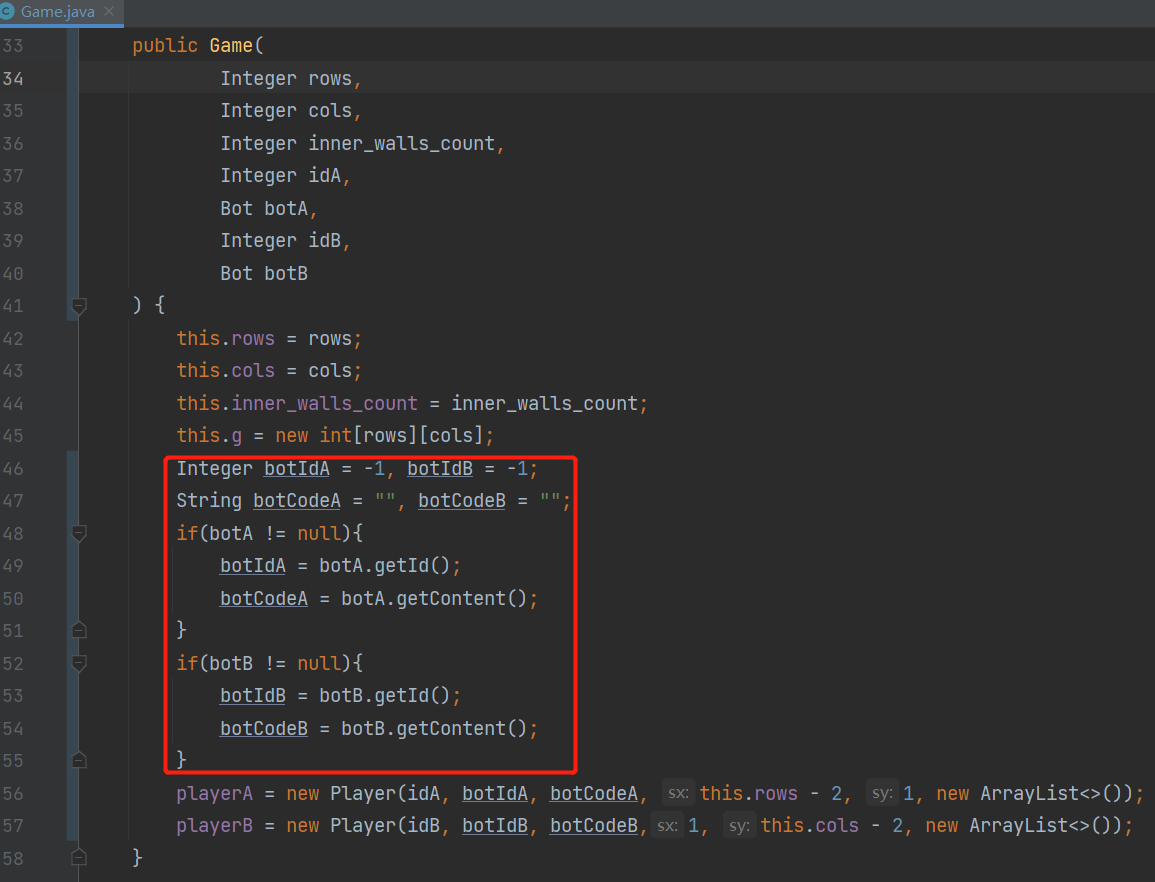
此时将 bot 的信息传入了 Game 中
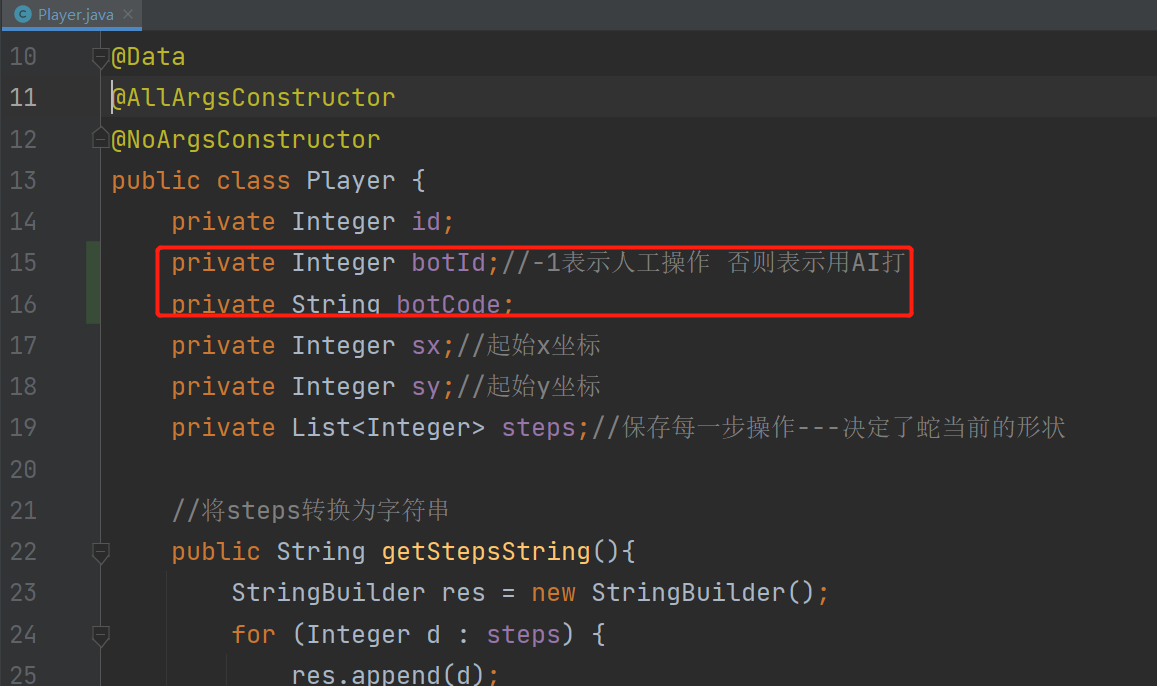
Bot or not 判断
取到了 bot 信息,创建完地图之后,在执行 nextstep 之前,判断 botid 是否等于-1,如果是-1,就要处理的是用户手动键入的指令,那么就等待用户输入;如果不等于-1,说明参与游戏的是 Bot 代码,则需要向 BotRunningSystem 发送消息,使其自动计算,并返回结果。
因此,需要在nextStep()中实现上述的判断。
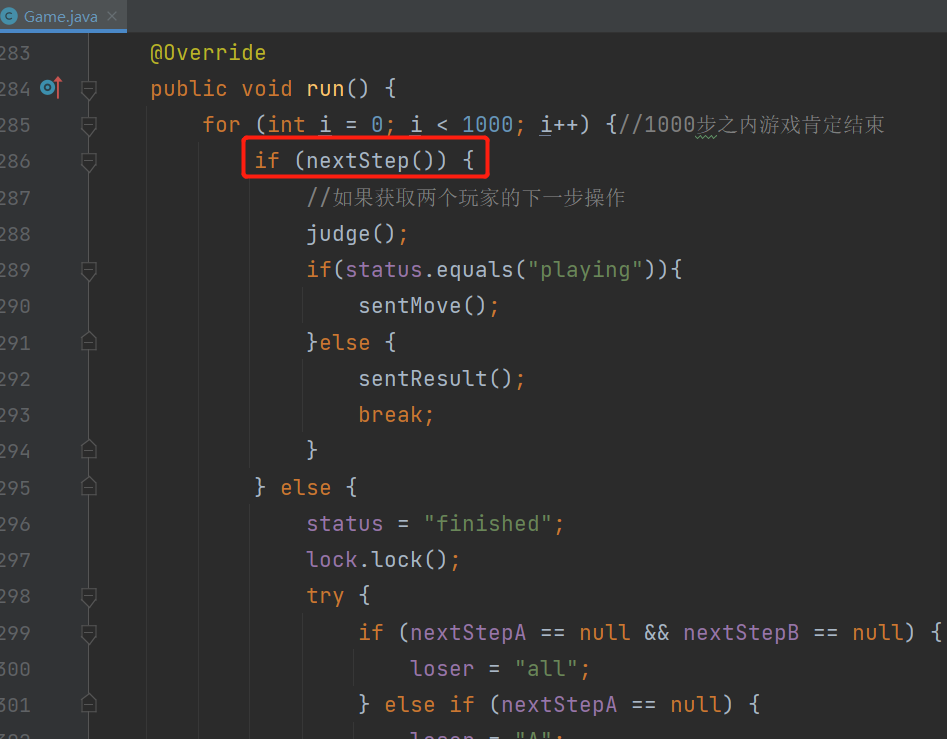
如果是人工输入,则无需操作;如果是 Bot 参与,需要将用户 id,bot 代码,以及当前的局面传到RotRunningSystem系统的BotRunningController
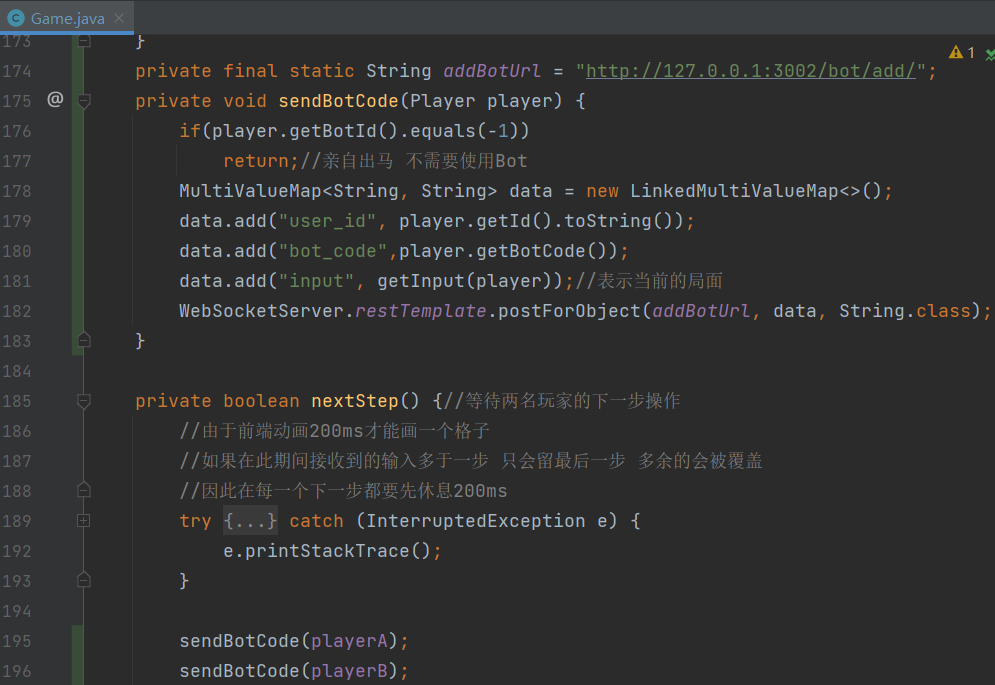
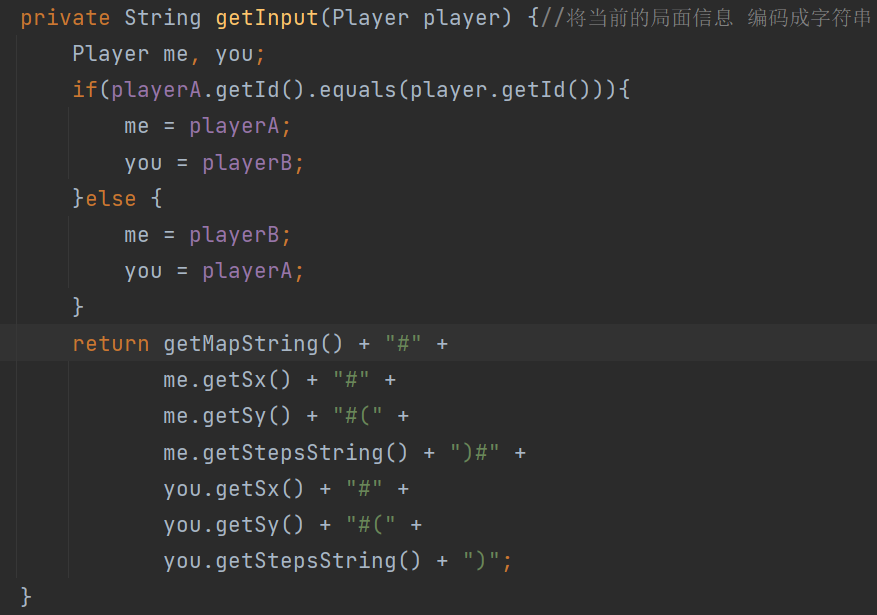
其中,getInput(Player player)表示获取当前游戏局面的信息
此外,为了防止人工输入和 bot 执行混淆,还需要在执行 bot 的时候,屏蔽掉用户的输入。只有判断用户亲自出马的时候,才接收人的输入。
测试如下:
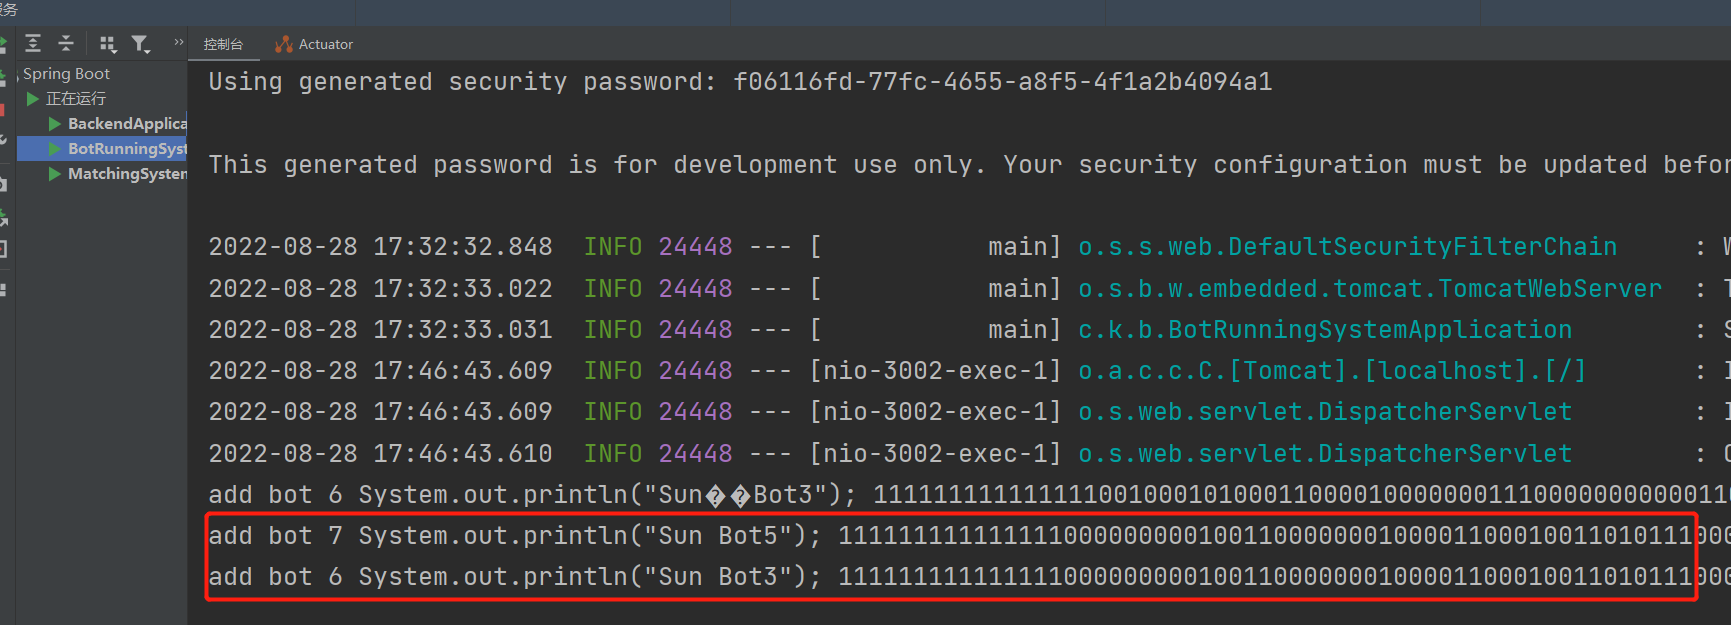
可以看到,经过了漫长的传递过程,此时bot的信息,终于传到了BotRunningSystem
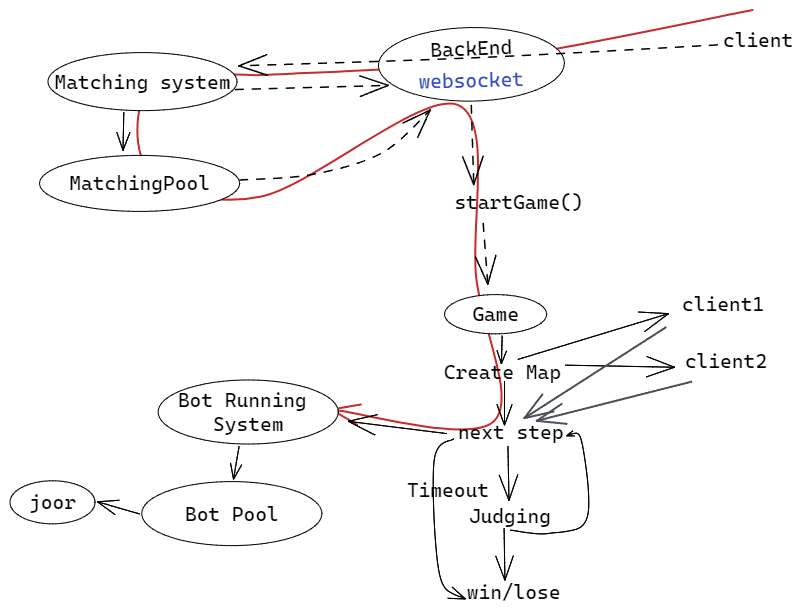
Bot 微服务
接下来就是本节的重点,也就是实现 Bot Running System 微服务。
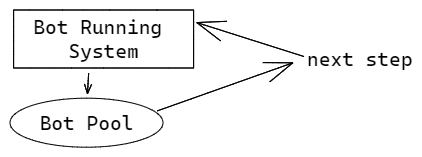
生产者—消费者模式
这部分的工作在于,不断的接收用户的输入,将接收到的代码放在一个队列里面,也就是队列中存储当前所有的任务。每接收一个来自生产者的任务过来,就将其放在队列里。BotPool 相当于消费者,每完成一个任务,检查一下队列是否为空,如果队列不空,就从队头取出代码执行。执行完之后继续检查。
MatchingPool 中的循环,每循环一次,sleep 一秒钟,但 BotPool 中的循环,为了保证用户体验,需要满足一旦有任务,立即执行。执行完之后,如果队列为空,就继续等待。因此两者循环的实现逻辑不一样,后者用到条件变量。
首先实现消费者线程及其流程。
消费者线程
1)如果任务队列为空,就要将其阻塞,当有任务出现时,就要发生信号量,将其唤醒。因此需要用到条件变量。
使用
condition.await()将当前线程阻塞Causes the current thread to wait until it is signalled or interrupted.
(导致当前线程等待,直到发出信号或中断。)
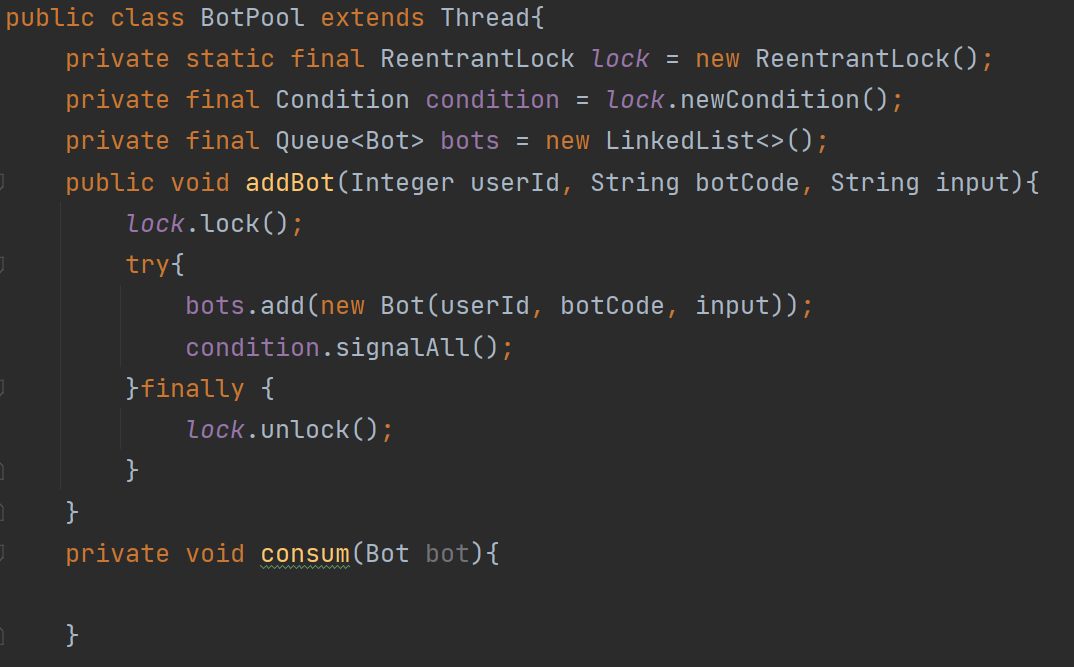
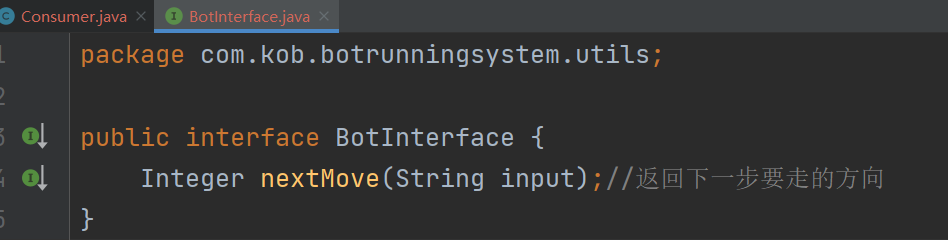
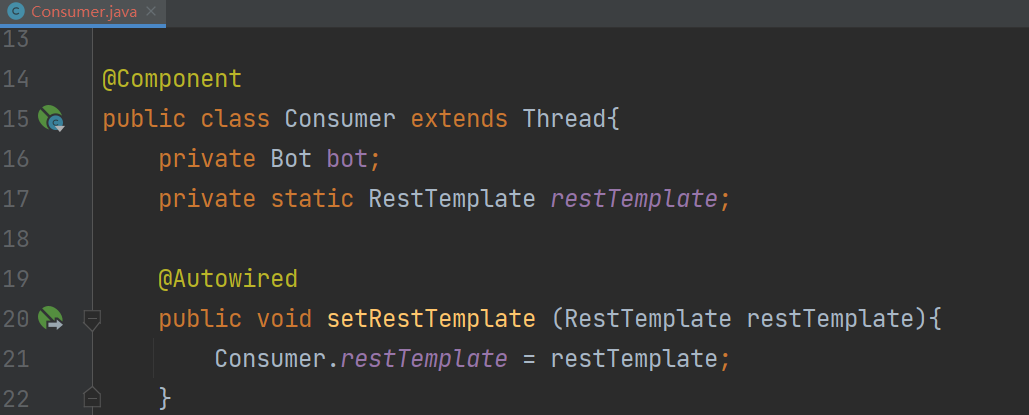
2)此外还需要队列,来存储Bot,定义一个Bot类,
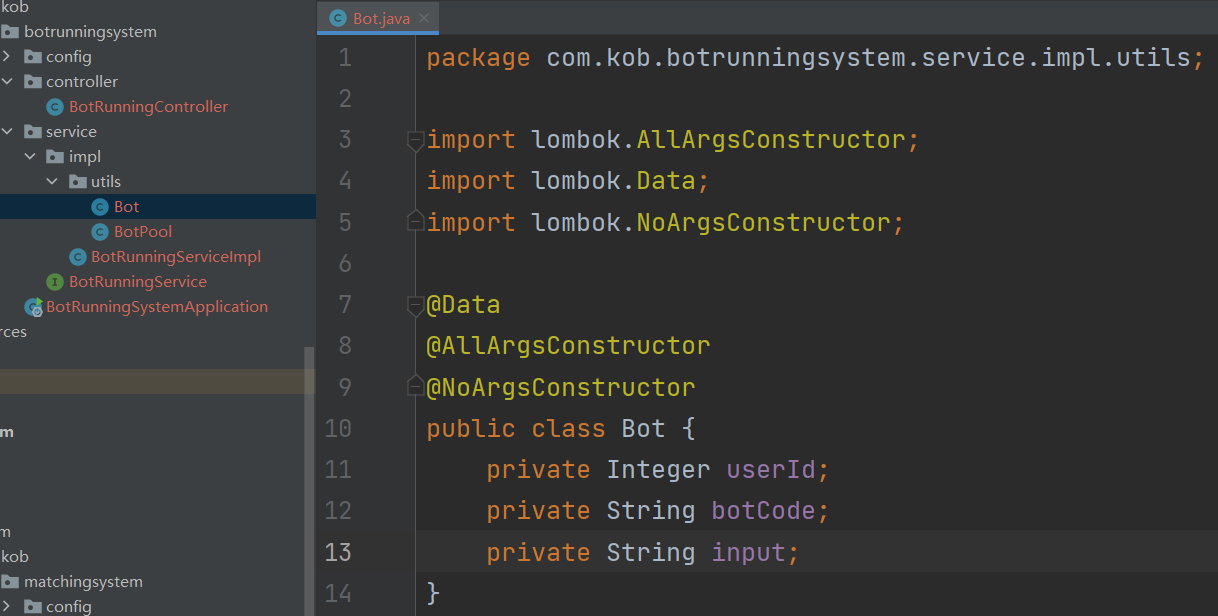
并定义一个存储 Bot 对象的队列Queue<Bot>。
生产者和消费者都会对
Queue<Bot>进行操作,因此处理的时候需要加锁。
3)在消费 Bot 对象之前,一点要先解锁,否则往队列添加 Bot 对象的时候就会被阻塞,但完全没有必要,因为没有读写冲突。
代码如下:
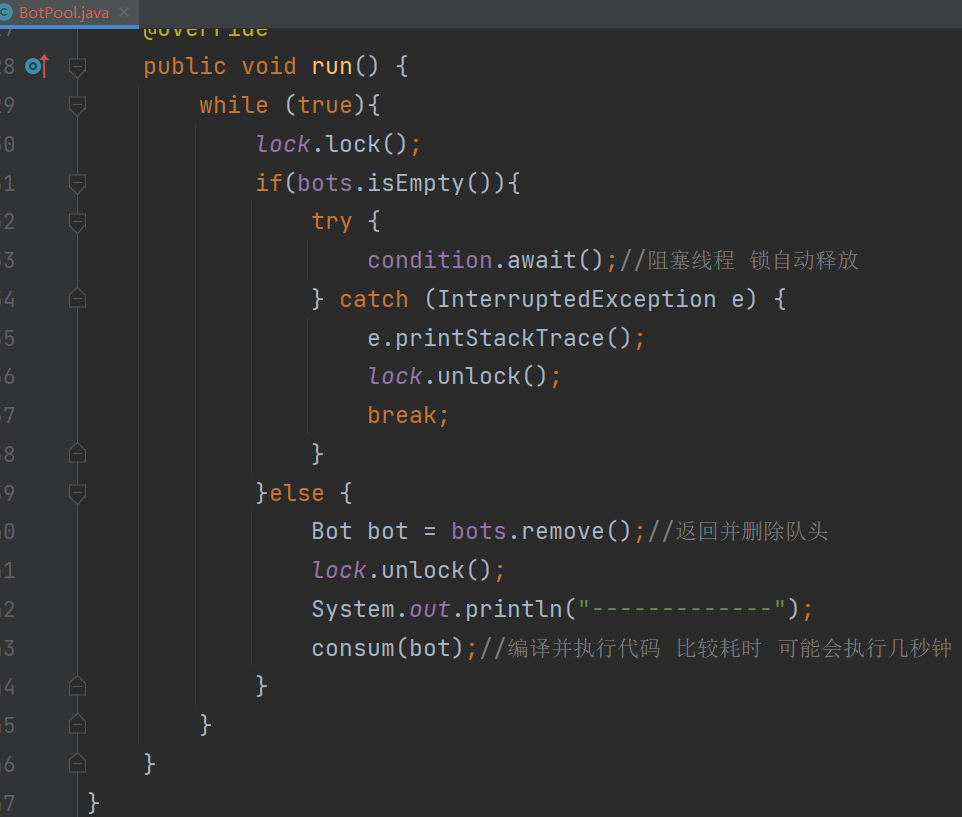
其中,如果队列为空,线程将会被阻塞。当addBot()被调用,队列中添加新的任务时,线程将会被唤醒
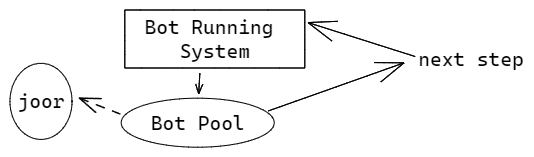
BotPool 线程的存储,以及关于添加 Bot 的调用,均放在BotRunningServiceImpl中
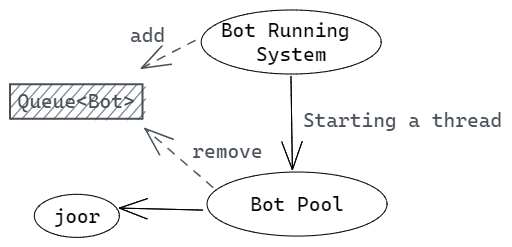
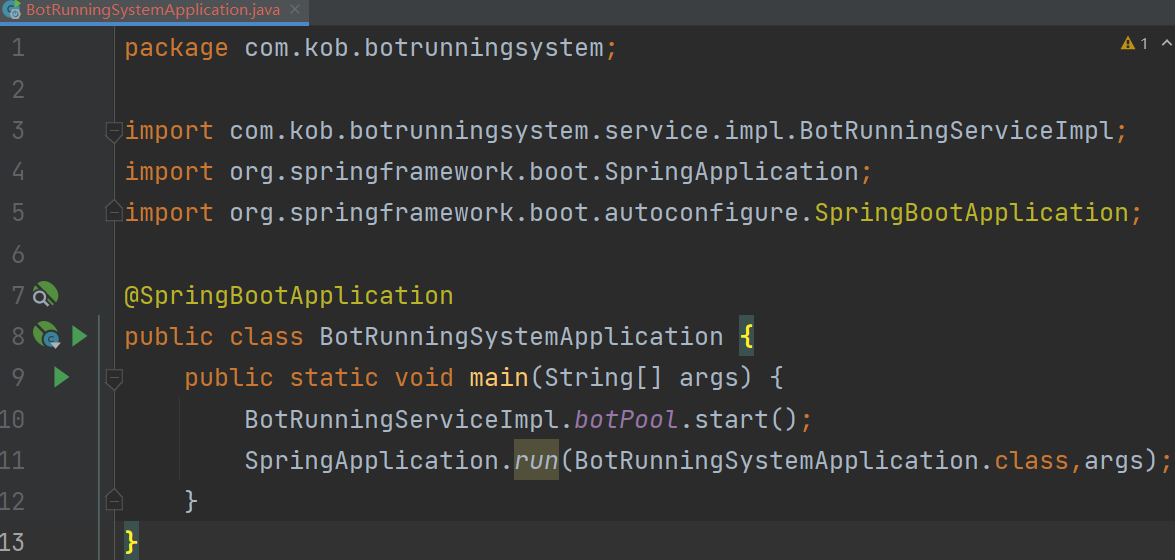
与匹配系统一样,也是在 BootStrap 服务启动的时候,启动 BotPool 线程。
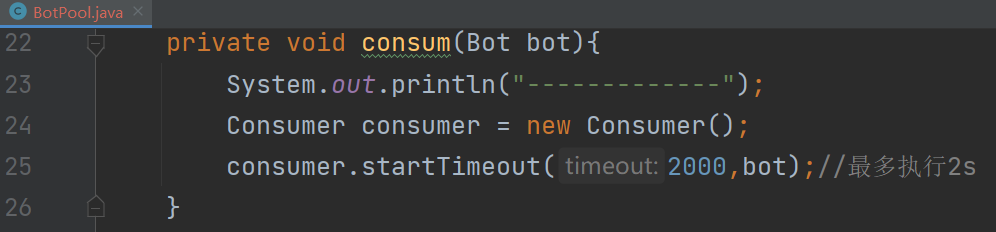
consum 操作
这里只是简单的实现 Java 代码的编译和执行。后续如果需要添加安全验证或者支持其他语言,只需要修改 consum 函数即可。对于安全验证,也就是防止程序运行可能产生的危害,可以将其放在沙箱中运行。对于支持其他语言,可以将 consum 函数改为对 docker 的执行(Java 中执行终端命令,将终端命令的执行放进 docker 即可)
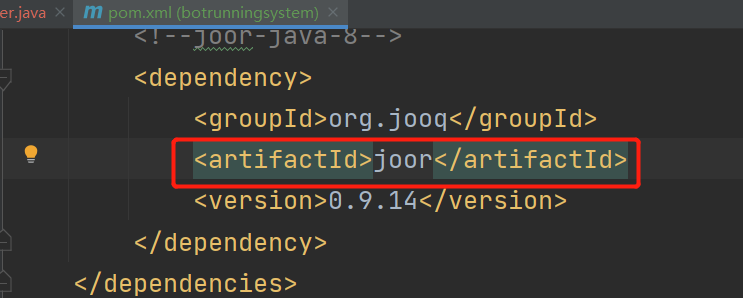
这里使用 Java 中的一个工具 Joor,可以动态编译和执行 Java 代码。
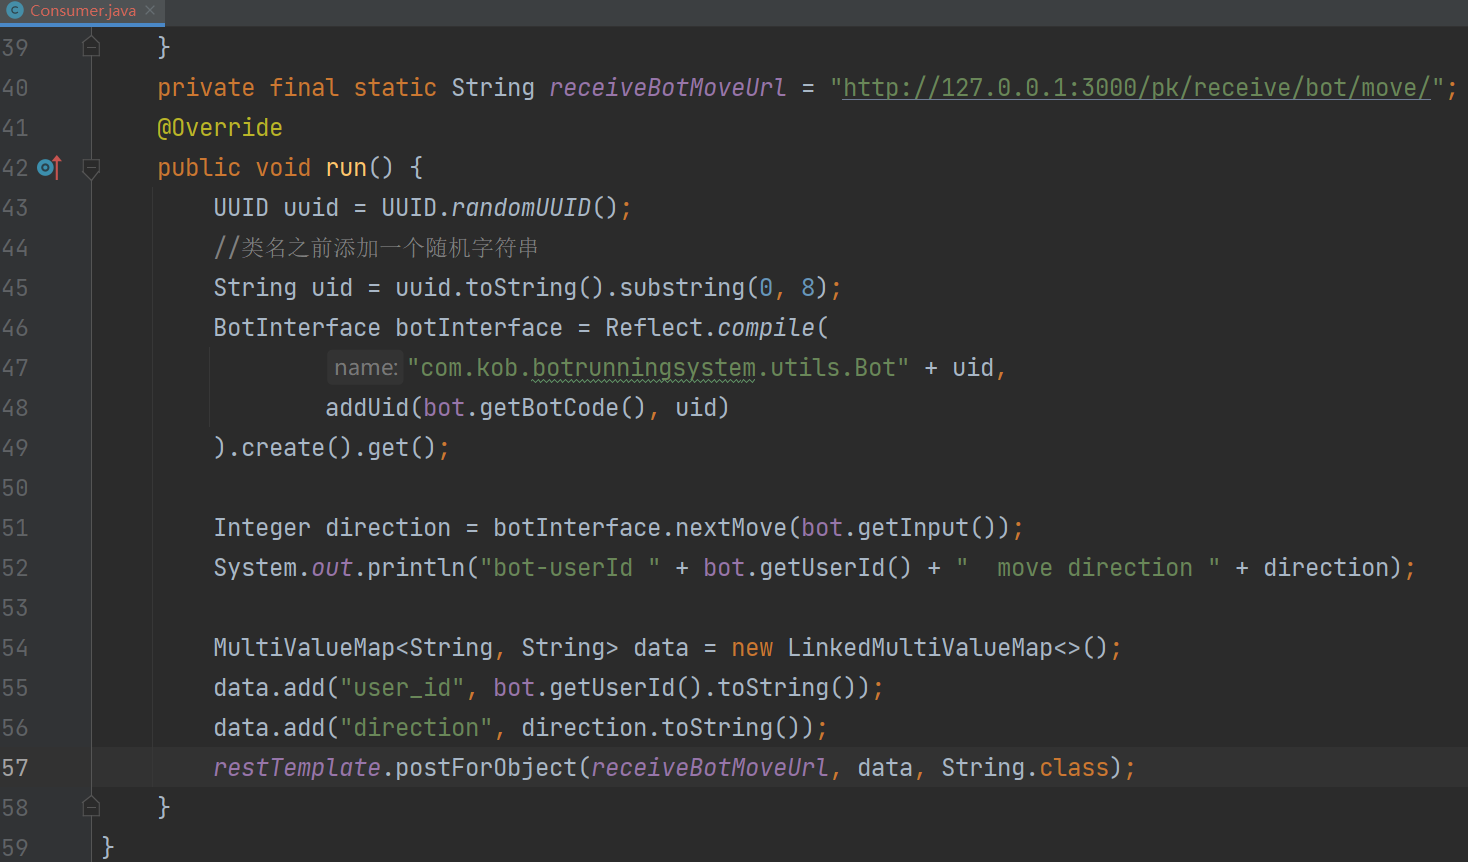
为了让整个执行过程时间可控,每执行一段代码,就需要将其放在一个线程中,线程可以支持如果超时就会断掉的操作。新建一个Consumer类用于表示这种线程。
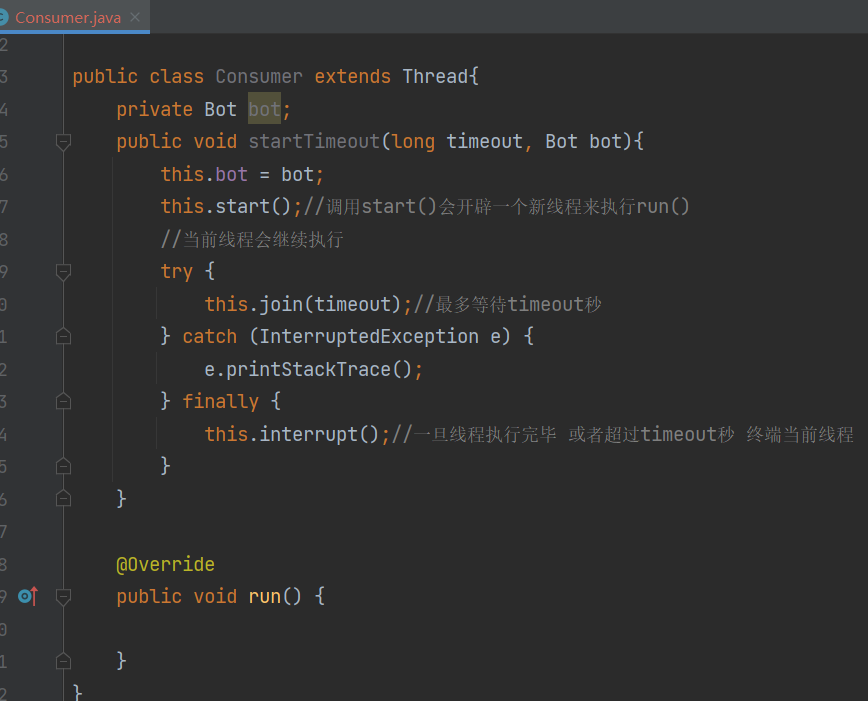
然后在botpool的consum函数中,创建一个Consumer对象,并调用对象的startTimeout方法。
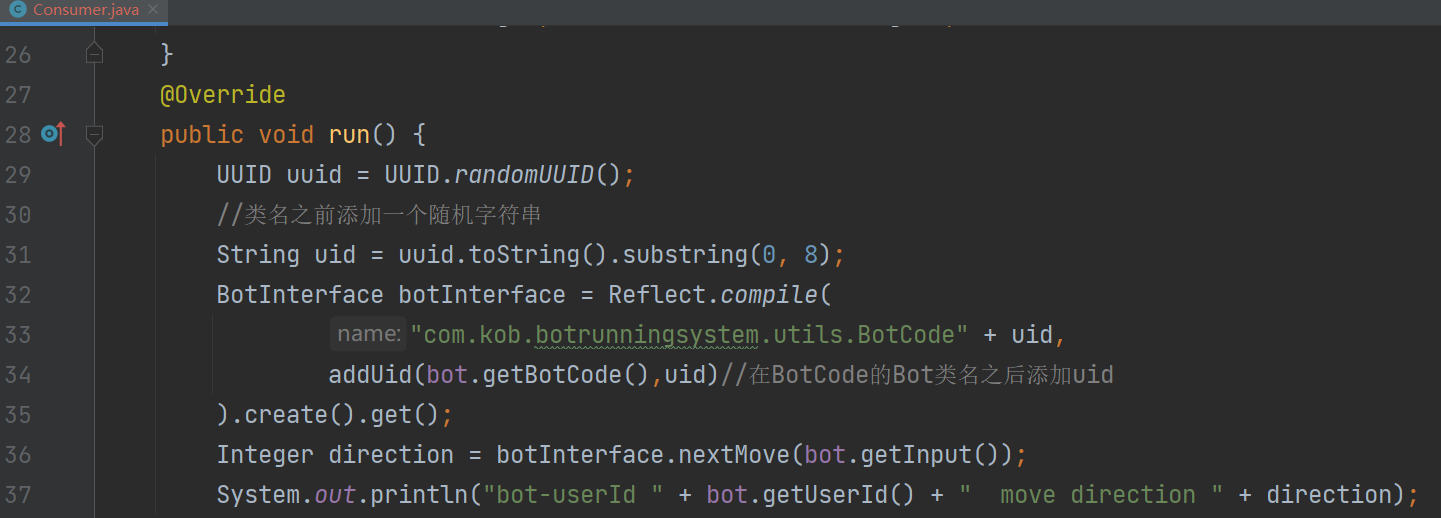
再回到Consumer类的run()中,需要使用到joor.Reflect类来动态编译执行一段代码
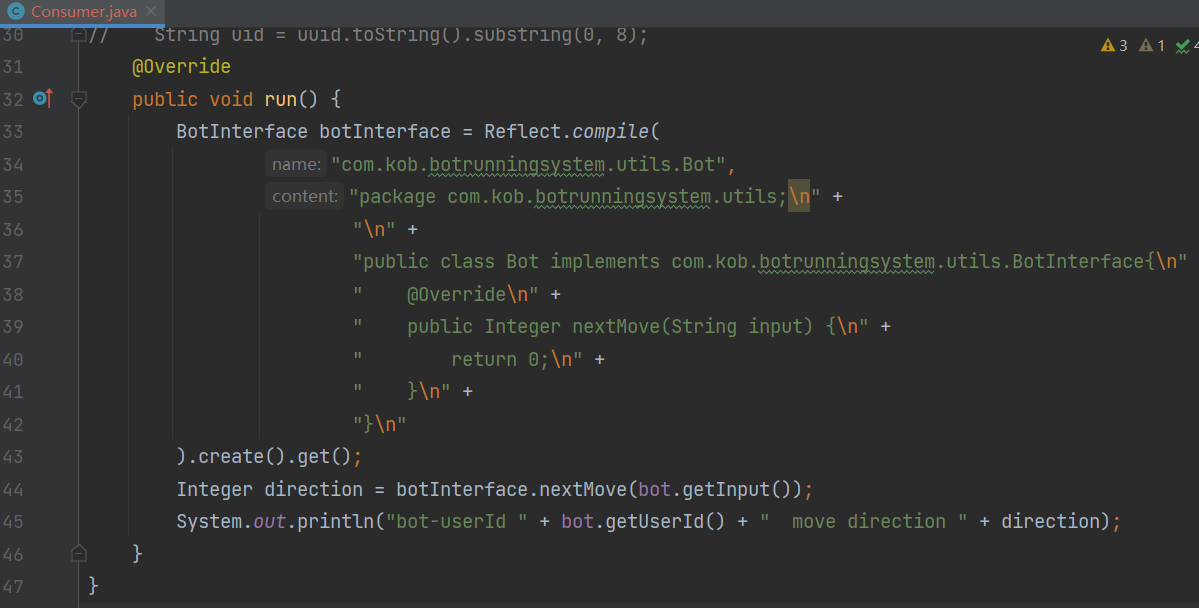
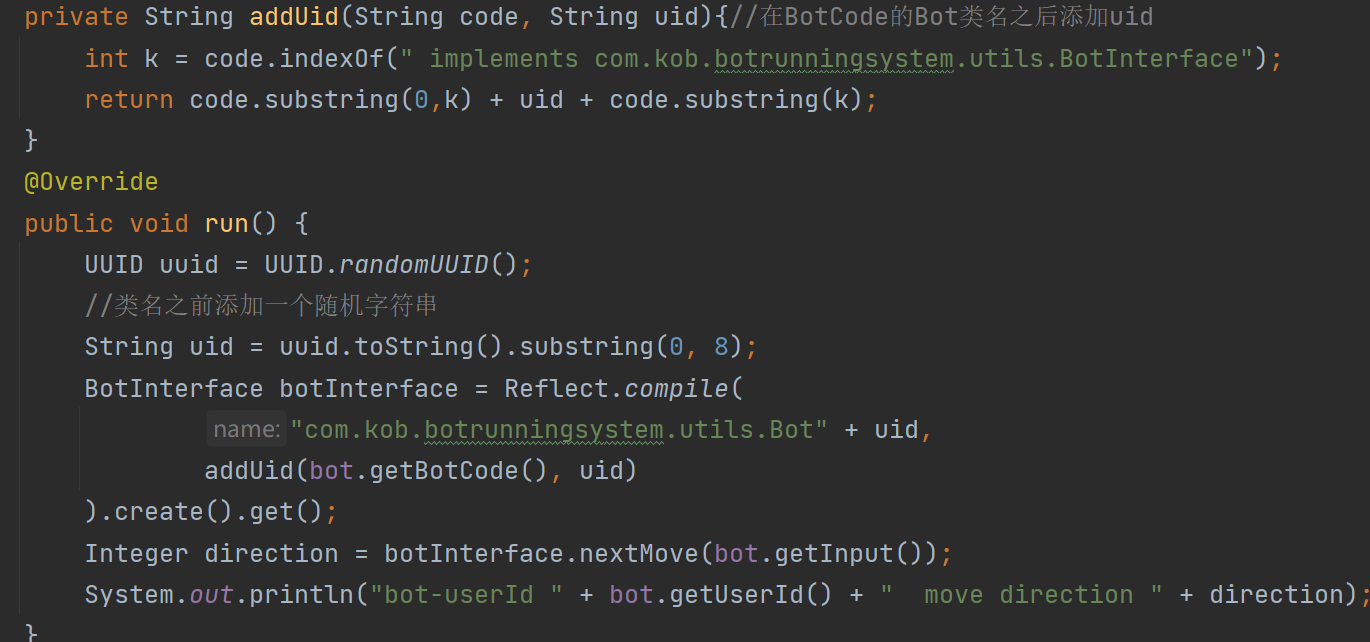
不过这里有个问题,在动态编译过程中,如果是重名的类,只会编译一次。但是对于每一个任务代码,都应该重新编译一遍,因此,需要在类名之前,添加一个随机字符串,来保证类不一样。
下面这段代码,就可以实现从前端动态接收一段代码,并动态编译一遍。
测试 Bot 代码
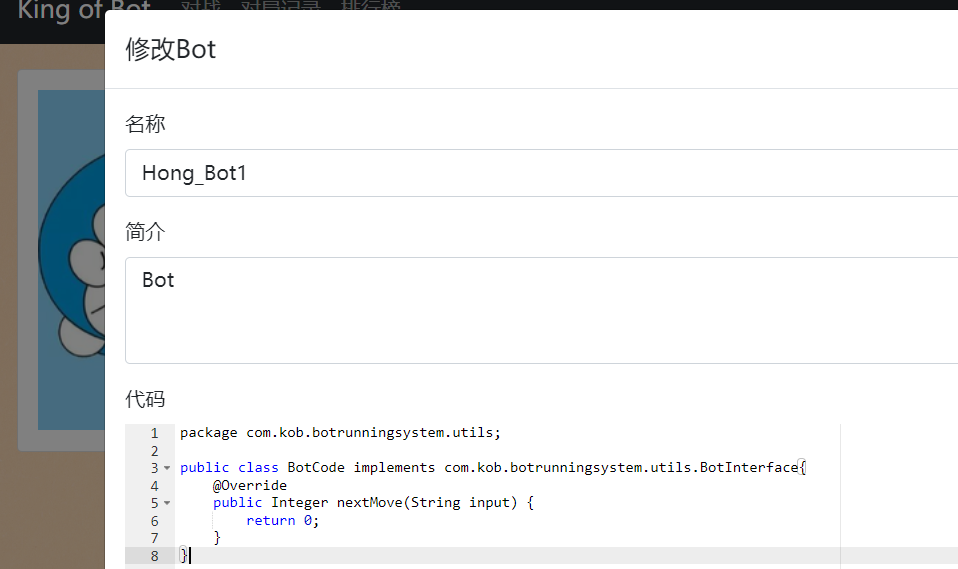
1)1 号玩家的 Bot,返回 0,表示向上走
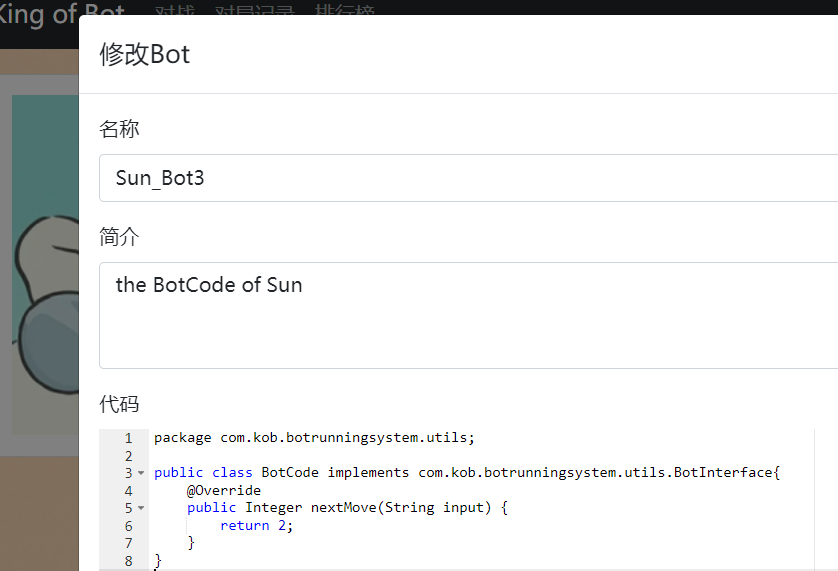
2)6 号玩家,返回 2,表示向下走
解决一个空指针异常

修改依赖
这样,在控制台中就能看到输出结果

表示 1 号玩家往上移动,6 号玩家往下移动。
此时 Bot 信息就传递到了 consumer(Joor)
接下来一步要考虑的,就是将 Bot 代码执行的结果,返回给 3000 断开的主后端服务器,最终传到 nextstep 中
Bot 结果返回
Backend API
为了接收consumer中计算的结果,我们要在主服务器中实现一个新的 API。

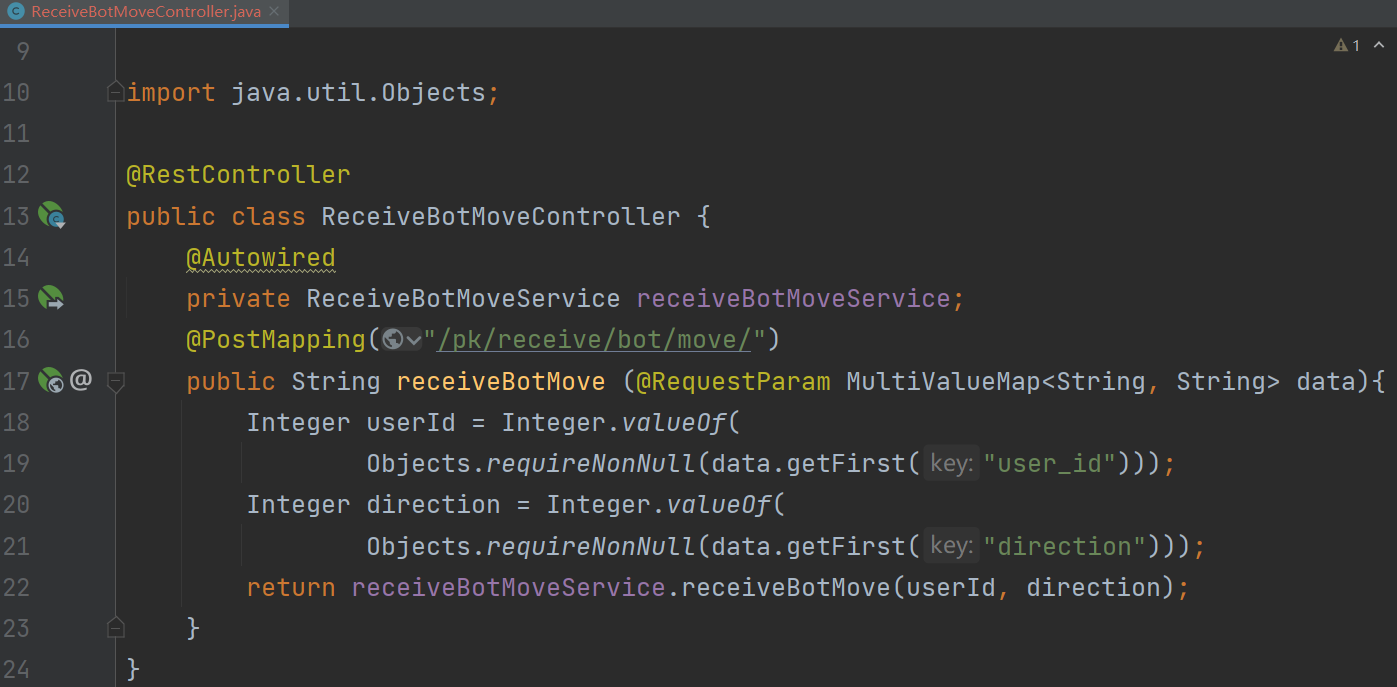
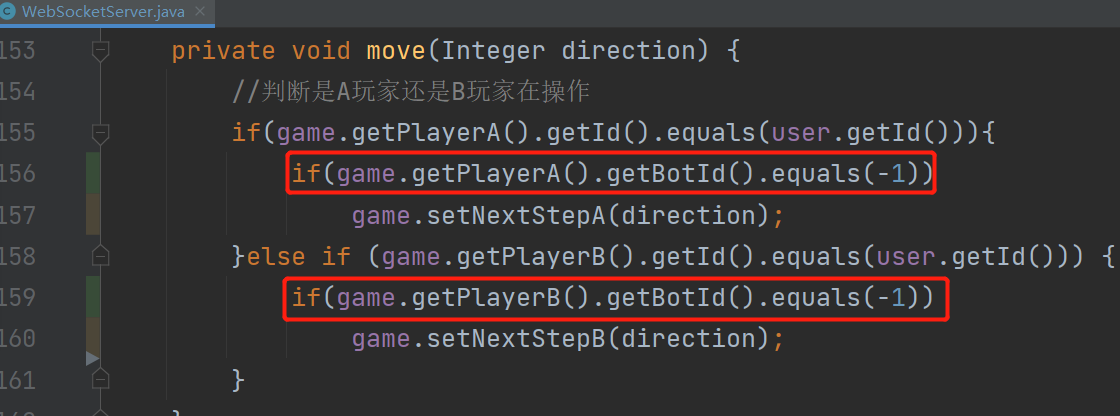
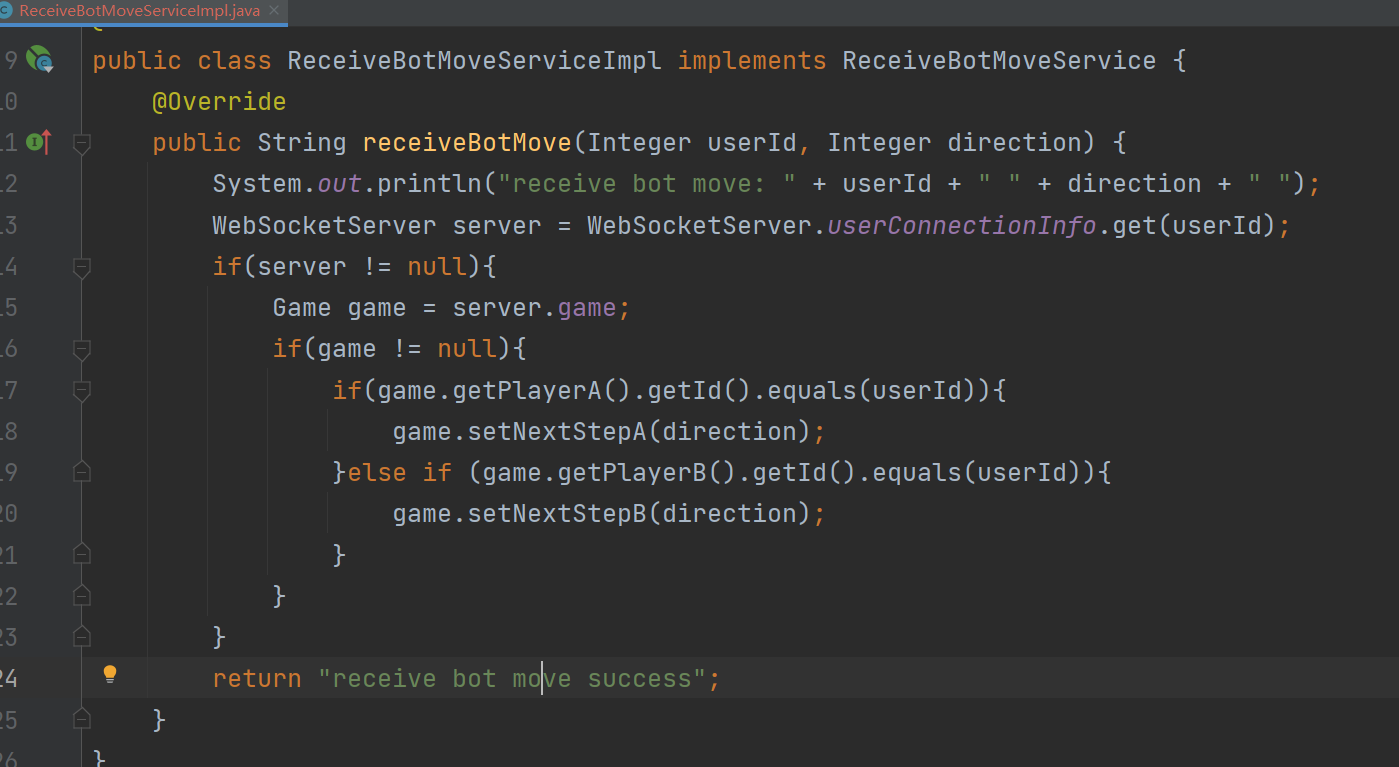
取出bot所对应的玩家userId和操作direction,然后需要玩家的操作传递到setNextStep
参考WebSocketServer中的move(玩家操作传递到setNextStep)
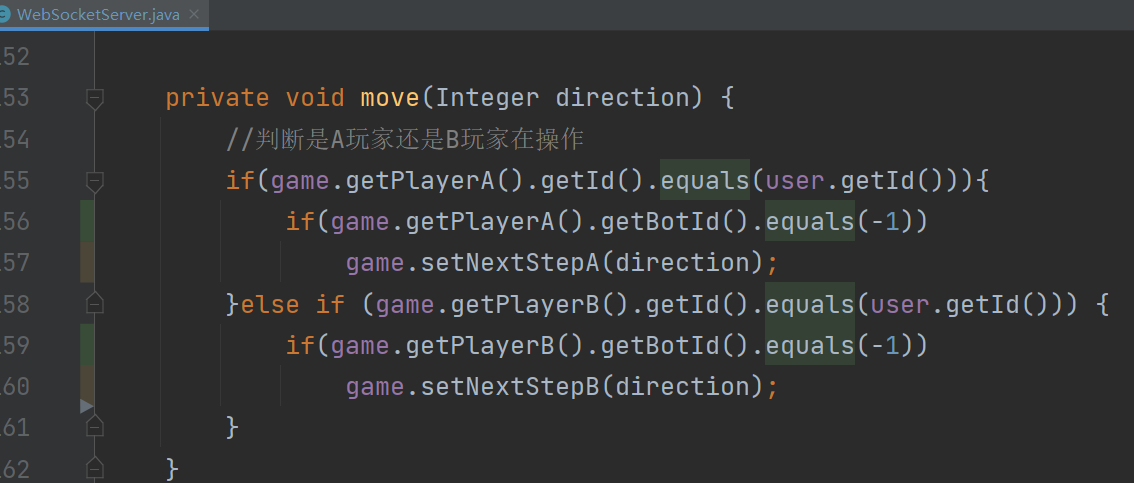
setNextStep
这样就能实现,用户 Bot 生成的操作,通过 Server 传递给 Game
现在只需要实现consumer动态编译 Bot 代码的结果返回给主服务器StartGameController
结果返回
将RestTemplate注入通过@Component到当前的Consumer类
通过RestTemplate将结果返回到主服务器(主服务器中的StartGameController接收)
此时,整个流程就已经打通,通信过程完成闭环。
功能测试
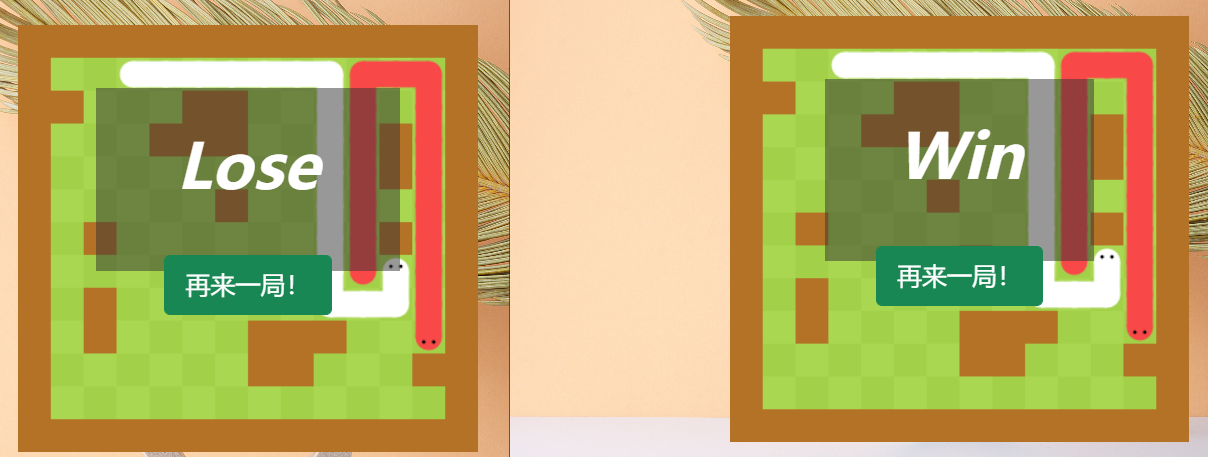
此时测试,两个 Bot 均可以实现自动执行。注意,先点击匹配的用户在左下角,后点匹配的在右上角。
可以修改使得左边用户返回 1,则会一直往右走。

当然,可以实现人机对战,即左边蛇一直往右走(Bot 运行)右边的蛇用户控制。
Bot 编写
设计过程
Bot 代码的编写可以直接在 IDEA 中实现,之后将其复制到浏览器上。
这里实现一个稍微正常一点的 AI,也就是在执行的时候判断上下左右哪一步可以走。
对 input 进行解码
1 | String[] str = input.split("#"); |

1)取出地图
1 | // 取出地图 |
2)取出两条蛇的路径
直接用之前在Play.java中写过的代码即可
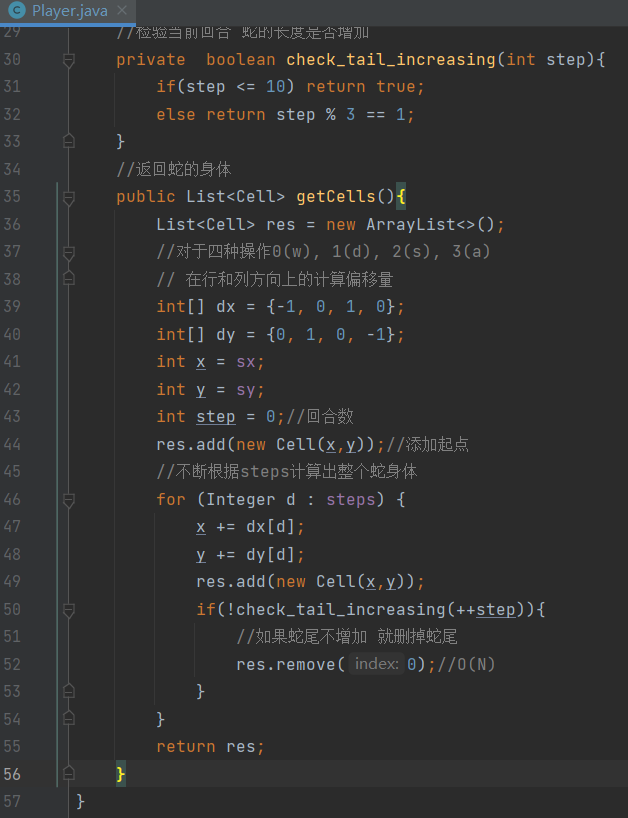
1 | //检验当前回合 蛇的长度是否增加 |
3)判断可行的移动方向
枚举一下上右下左四个方向,一旦发现可以走,就设定移动方向。
1 | // 判断可行的移动方向 |
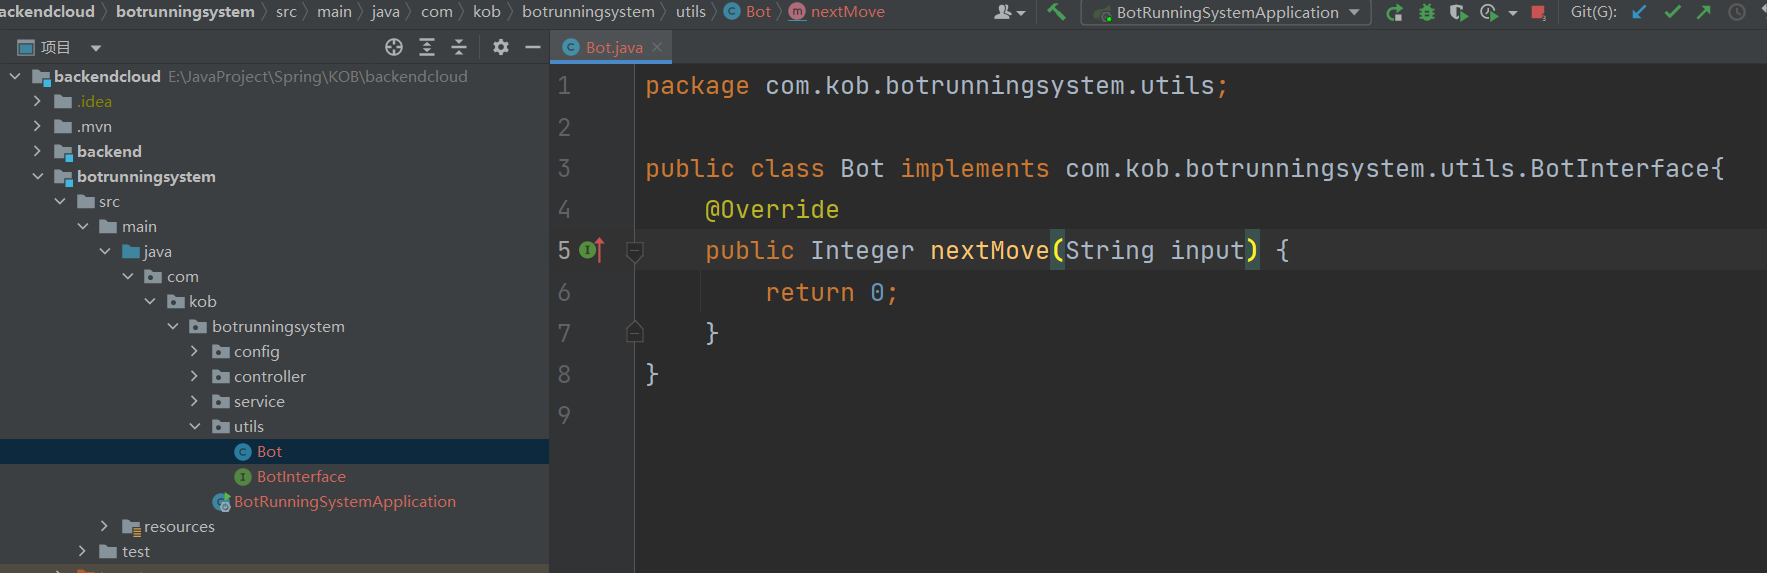
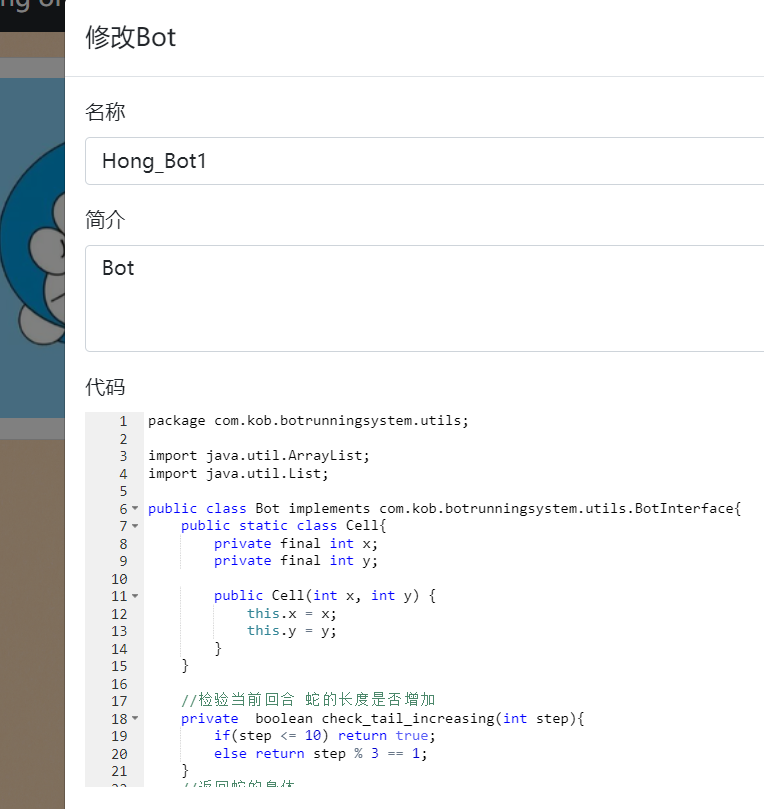
代码实现
1 | package com.kob.botrunningsystem.utils; |
应用
将两个 bot 修改替换为上面的代码
如果需要对 Bot 代码需要调试,只能通过 println 的方式,添加到原来 bot 中。
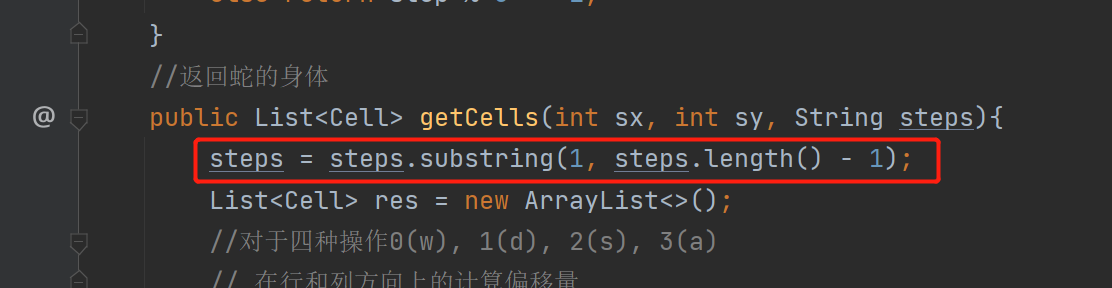
对于操作而言,需要去掉两端的括号。
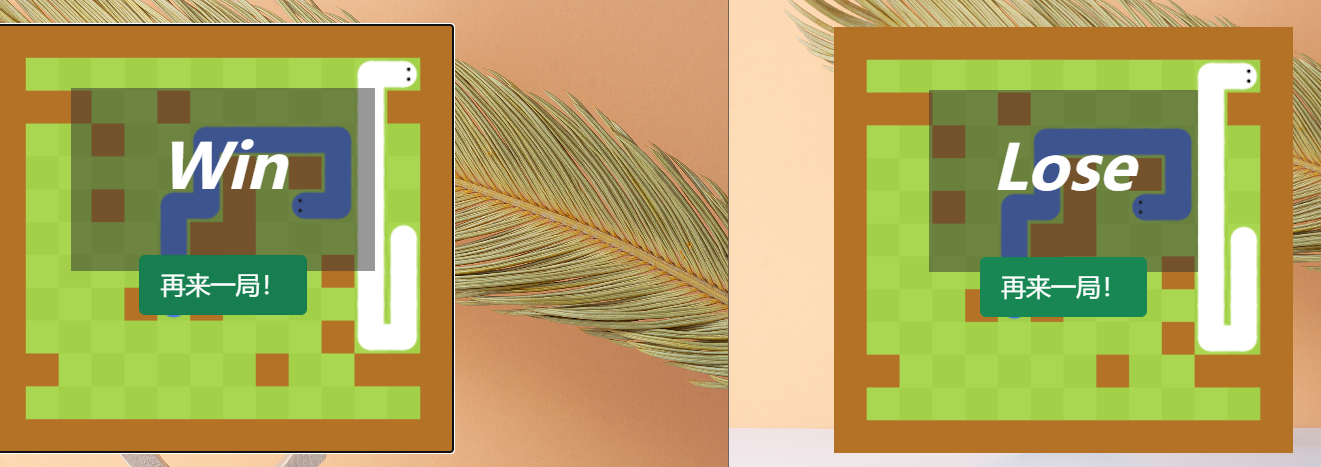
此时测试,成功!
也可以人机对战
至此,这部分的代码全部完成。